Solving Your Issue: When Your Printer Won’t Print | Expert Guide
Originally posted on November 8, 2023 @ 10:42 pm
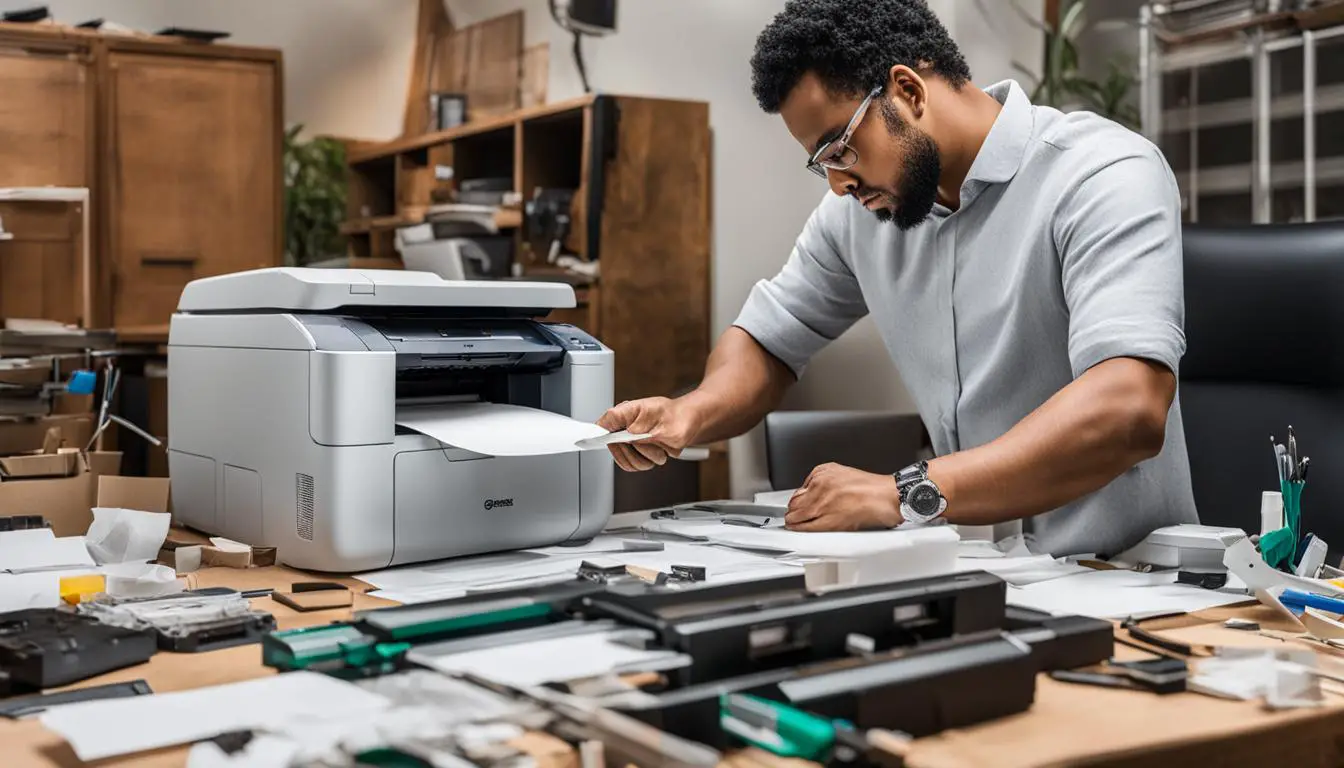
If your printer is unresponsive or refusing to print, it can be a source of frustration and hindrance to your work. Nonetheless, there are ways to resolve this issue and get your printer back in working order. In this informative guide, we will share troubleshooting advice to assist you in efficiently solving the problem.
Key Takeaways:
- If your printer is not printing, there can be various reasons behind the issue.
- Check your printer’s error lights for clues about the problem.
- Clear the printer queue to remove stuck or failed print jobs.
- Restart the print spooler to refresh the printing system.
- Solidify the connection by checking the printer’s Wi-Fi signal or connecting via USB.
Check Your Printer’s Error Lights
If your printer is showing error lights, it’s important to understand what they mean in order to diagnose and resolve the issue. Error lights can indicate a variety of problems, from a paper jam to low ink levels. To decode the error message, consult your printer’s manual or visit the manufacturer’s support website. This will provide you with specific information on what the error lights are trying to communicate.
By understanding the specific error, you can take appropriate steps to troubleshoot the problem. For example, if the error light indicates a paper jam, you can follow the instructions in your printer’s manual to clear the jam. If the error light is related to low ink levels, you may need to replace the ink cartridges. Knowing the exact nature of the error will guide you in further diagnosis and troubleshooting.
Remember to always refer to the official documentation provided by the manufacturer when dealing with error lights. They are designed to help you identify and resolve issues with your printer effectively.
Check Your Printer’s Error Lights:
| Error Light | Meaning | Resolution |
|---|---|---|
| Red Light Blinking | Paper Jam | Refer to the printer’s manual for instructions on clearing the jam. |
| Yellow Light Blinking | Low Ink | Replace the ink cartridges with new ones. |
| Red and Yellow Lights Alternating | Other Hardware Issue | Contact the manufacturer’s support for further assistance. |
By following the instructions provided by the manufacturer, you can resolve the issue indicated by the error lights and get your printer back up and running smoothly.
Clear the Printer Queue
If you’re experiencing the frustrating problem of a printer that won’t print, one of the first steps you can take to resolve the issue is to clear the printer queue. The printer queue, also known as the print spooler, is a software program that manages the print jobs on your computer. Sometimes, the printer queue can get jammed with old documents that failed to print, causing new print jobs to get stuck. By clearing the printer queue, you can remove any stuck or failed print jobs and get your printer back on track.
To clear the printer queue, follow these steps:
- Open the Control Panel on your computer.
- Select “Devices and Printers” or “Printers and Scanners”.
- Locate your printer in the list of installed printers.
- Right-click on your printer and select “See what’s printing” or “Open print queue.
- In the print queue window, click on “Printer” in the menu bar.
- Select “Cancel All Documents” or “Clear All Documents”.
Once you’ve cleared the printer queue, try printing a test page or a new document to see if the issue has been resolved.
Example Table: Printer Queue
| Document Name | Status | Action |
|---|---|---|
| Document A | Printing | Cancel |
| Document B | Stuck | Cancel |
| Document C | Stuck | Cancel |
| Document D | Printed | N/A |
In this example table, you can see the list of documents in the printer queue. “Document A” is currently printing, while “Document B” and “Document C” are stuck. To clear the printer queue, you would click on the “Cancel” action for the stuck documents. Once cleared, the printer should be able to proceed with printing new documents.
Restart the Print Spooler
If clearing the printer queue doesn’t resolve the issue, you can try restarting the print spooler. The print spooler is a Windows service that manages print jobs and ensures they are sent to the printer correctly. Sometimes, restarting the print spooler can help refresh the printing system and potentially solve any lingering issues.
To restart the print spooler, follow these steps:
- Open the “Run” dialog box by pressing the Windows key + R.
- Type “services.msc” and press Enter to open the Services window.
- Scroll down and locate the “Print Spooler” service.
- Right-click on “Print Spooler” and select “Restart” from the dropdown menu.
- Wait for the service to restart, and then close the Services window.
After restarting the print spooler, try printing a test page or document to see if the issue has been resolved. If the print spooler continues to encounter errors or fails to start, you may need to troubleshoot further or seek professional assistance to resolve any underlying issues with the print spooler service.
Solidify the Connection
If you’re experiencing issues with your printer not connecting, it’s essential to ensure a stable and reliable connection before troubleshooting further. Follow these steps to solidify the connection between your printer and computer:
1. Connect via USB
If you’re using a wireless connection (Wi-Fi) to print, try connecting your computer directly to the printer using a USB cable. This will help determine if the issue lies with the Wi-Fi connection. Once connected, attempt to print a test page or document to see if it resolves the problem.
2. Check Wi-Fi Signal and Network List
If you prefer using a wireless connection, make sure your printer is within range of the Wi-Fi signal. Ensure that there are no physical obstructions or interference between the printer and the Wi-Fi router. Additionally, check if your printer appears in the network list on your router’s settings page. If it does not appear, try reconnecting the printer to the Wi-Fi network following the manufacturer’s instructions.
3. Troubleshoot Network Connectivity
If your printer is still not connecting to the Wi-Fi, you may need to troubleshoot network connectivity issues. Ensure that your computer is connected to the correct Wi-Fi network by checking the network settings. Restart your router to refresh the network connection, and try reconnecting your printer to the Wi-Fi network. If the problem persists, consult your printer’s user manual or the manufacturer’s support website for specific troubleshooting steps.
By solidifying the connection between your printer and computer, you can address potential connectivity issues that may be preventing your printer from functioning properly. Following these steps will help you determine if the issue lies with the connection itself or if further troubleshooting is required.
| Printer Connection Tips | Printer Wi-Fi Issues | Printer USB Connection |
|---|---|---|
| Ensure a stable Wi-Fi signal | Check Wi-Fi network list | Connect printer directly to computer via USB |
| Troubleshoot network connectivity | Reconnect printer to Wi-Fi network | Test if USB connection resolves the issue |
| Restart router | Refer to printer manual for Wi-Fi troubleshooting steps |
Ensure You Have the Right Printer
When encountering printing issues, it’s essential to verify that you have selected the correct printer for the task. This is especially important if you have multiple printers connected to your computer or if you recently switched printers. Failure to select the right printer can lead to frustration and wasted time.
To ensure you are printing to the correct printer, carefully review the printer settings before sending a document for printing. Take note of the printer name and make sure it matches the physical printer you intend to use. This step is crucial to prevent mistakenly sending print jobs to the wrong device.
If you’re unsure which printer to choose, you can check the connected printers list on your computer. This list will display all the printers that are currently connected and available for use. By selecting the correct printer from this list, you eliminate the risk of sending your print jobs to an unintended device.
| Common Steps to Ensure the Right Printer is Selected: |
|---|
| 1. Open the print dialog box by clicking “Print” or pressing Ctrl + P. |
| 2. Double-check the printer name or model in the print settings. |
| 3. Verify that the printer you want to use appears in the connected printers list. |
By following these simple steps, you can avoid the frustration of printing to the wrong device and ensure that your documents are sent to the correct printer for efficient processing.
Check That the Paper Tray Is Full (Not Jammed)
One common issue that can prevent your printer from printing is a paper tray that is either empty or jammed. It’s important to ensure that the paper tray is properly filled and aligned to avoid any interruptions in the printing process. Here are some steps you can take to check and address any issues with the paper tray:
- Inspect the paper tray: Open the access panel of your printer to locate the paper tray. Check if the tray is empty or if there are any visible paper jams. If the tray is empty, insert a stack of paper, making sure the paper is aligned correctly.
- Clear any paper jams: If you notice any paper jams in the tray, carefully remove the jammed paper. Follow the instructions provided in your printer’s manual to clear the jam. It’s important to remove all torn or stuck paper bits to prevent future issues.
- Realign the paper: Sometimes, the printer may mistakenly think the paper tray is empty even when there is paper loaded. Remove the paper tray, realign the paper stack, and ensure it’s inserted correctly. Pay attention to any guides or markings in the tray to ensure proper alignment.
If you’ve checked the paper tray and resolved any issues, try printing a test page to see if the problem is resolved. If the printer still won’t print, there may be smaller bits of paper or residue stuck inside the printer’s rollers. In such cases, it’s advisable to seek professional assistance to avoid any damage to the printer mechanism.
Keeping your paper tray filled and free from jams is essential for smooth printing operations. By following these steps, you can ensure that your printer’s paper tray is in optimal condition, allowing you to print your documents without any hassle.
Install the Drivers and Software
One common reason why your printer may not be printing is due to missing or outdated drivers and software. When connecting a printer to your computer, Windows usually installs the necessary drivers automatically. However, in some cases, you may need to manually download and install the printer driver or software from the manufacturer’s website.
To ensure proper functionality, it is crucial to have the latest and compatible driver for your specific printer model. Visiting the printer manufacturer’s website allows you to download the most up-to-date drivers and software tailored to your printer’s requirements. This ensures compatibility and can help resolve any compatibility issues or bugs that may be causing the printing problem.
In addition to the manufacturer’s website, you may also consider third-party printer drivers if the official drivers do not solve the issue. However, exercise caution when downloading drivers from third-party sources, as they may not be as reliable or trustworthy as the manufacturer’s website.
Installing Printer Drivers
- Visit the printer manufacturer’s website and go to the “Support” or “Downloads” section.
- Search for your specific printer model and operating system.
- Select the driver or software package that matches your printer and operating system version.
- Download the driver or software package to your computer.
- Once the download is complete, locate the file and double-click on it to run the installation wizard.
- Follow the on-screen prompts to install the driver or software.
- Restart your computer to complete the installation process.
After installing the drivers and software, reconnect your printer to the computer and check if the printing issue has been resolved. If not, continue troubleshooting using the other methods outlined in this guide.
| Printer Drivers Installation Checklist |
|---|
| ✓ Visit the manufacturer’s website |
| ✓ Search for your specific printer model and operating system |
| ✓ Download the driver or software package |
| ✓ Run the installation wizard |
| ✓ Restart your computer |
Fiddle With the Ink Cartridges
If your printer is indicating that it’s out of ink when you know it isn’t, there are several steps you can take to troubleshoot the issue. Start by cleaning the print head using the printer’s built-in cleaning routine. This can help remove any clogs or debris that may be affecting the ink flow. You can also try blotting the ink cartridges with a wet paper towel to unclog any dried ink.
For laser printers, gently shaking the toner cartridge can help redistribute the toner and ensure better print quality. If your printer still doesn’t recognize the new ink cartridges, consult the printer’s manual for instructions on resetting the ink fill levels. Some printers have a specific method for resetting the ink levels to make them compatible with new cartridges.
When replacing ink cartridges, consider using genuine cartridges from the printer manufacturer. While third-party cartridges may be cheaper, they may not always provide the same compatibility and performance as genuine cartridges. Using genuine cartridges can help ensure optimal print quality and reduce the chances of compatibility issues.
Remember to always follow the manufacturer’s instructions when dealing with ink cartridges. Mishandling or improper installation can lead to printer malfunctions or damage.
Printer Cartridge Cleaning Tips:
- Use the printer’s built-in cleaning routine to unclog the print head.
- Gently blot the ink cartridges with a wet paper towel to remove any dried ink.
- For laser printers, shake the toner cartridge to distribute the toner evenly.
- If the printer doesn’t detect new ink cartridges, consult the manual for resetting instructions.
- Consider using genuine cartridges for optimal compatibility and performance.
| Ink Cartridge Troubleshooting Steps | Results |
|---|---|
| Cleaning the print head | Removes clogs and debris, improves ink flow |
| Blotting ink cartridges | Unclogs dried ink, improves print quality |
| Shaking toner cartridge | Redistributes toner, enhances print quality |
| Resetting ink fill levels | Makes printer recognize new cartridges |
| Using genuine cartridges | Ensures optimal compatibility and performance |
Run the Printer’s Self-Test
If you have exhausted all other troubleshooting steps and your printer is still not working, running a self-test can provide valuable diagnostic information. Most printers have a self-test feature that allows you to check the hardware functionality and identify any underlying issues.
To perform a self-test, refer to your printer’s manual or visit the manufacturer’s support website for specific instructions. Typically, you will need to press a combination of buttons or navigate through the printer’s menu options to initiate the test. Once started, the printer will print a test page that can help you assess its performance.
During the self-test, pay attention to any error codes or messages that appear on the test page. These codes can provide valuable insights into the problem and guide you towards the appropriate solution. Consult the printer’s manual or the manufacturer’s support resources to decipher the error codes and determine the necessary steps to resolve the issue.
If the self-test indicates that the printer hardware is functioning correctly, the problem may lie within the software or connectivity settings. In such cases, revisit the previous troubleshooting steps in this guide to ensure all settings are correctly configured and that there are no underlying software conflicts. If the self-test reveals hardware errors or persistent issues, it may be necessary to seek professional assistance or contact the printer’s manufacturer for further support.
FAQ
How can I decode the error message displayed on my printer?
Consult your printer’s manual or visit the manufacturer’s support website for decoding the error message.
What should I do if the print queue is jammed with old documents?
Open the printer queue on your computer and remove any stuck or failed print jobs to clear the queue.
Is restarting the print spooler a potential solution?
Yes, you can try restarting the print spooler by accessing the Command Prompt as an administrator and executing a series of commands.
How can I check if the issue lies with the Wi-Fi connection?
Connect your computer to the printer via USB to see if the problem persists. Also, ensure your printer is within range of the Wi-Fi signal.
What should I do if I accidentally send a print job to the wrong printer?
Double-check the print settings and select the correct printer from the drop-down menu to avoid sending print jobs to the wrong device.
How can I ensure that my printer’s paper tray is properly filled and aligned?
Make sure the paper tray is filled with paper and aligned correctly. If there is a paper jam, follow the instructions in your printer’s manual to clear it.
What should I do if my printer is not installing the necessary drivers automatically?
Manually download and install the printer driver or software from the manufacturer’s website to ensure proper functionality.
What can I try if my printer indicates that it’s out of ink when it isn’t?
Clean the print head or gently shake the toner cartridge. Refer to the printer’s manual for instructions on resetting the fill levels. Genuine cartridges may provide better compatibility and performance.
How can running a self-test on my printer help diagnose the problem?
Running a self-test can indicate whether the printer hardware is functioning correctly or if there are any hardware issues that require further inspection or repair.
