How To Master Ultimaker 3D Printer In Easy Steps
Originally posted on December 4, 2023 @ 10:16 pm
This guide will assist you in becoming an expert at utilizing the Ultimaker 3D printer, regardless of whether you are a professional or an enthusiast. With its in-depth instructions, you will be able to fully utilize all of the features available on this cutting-edge 3D printer.
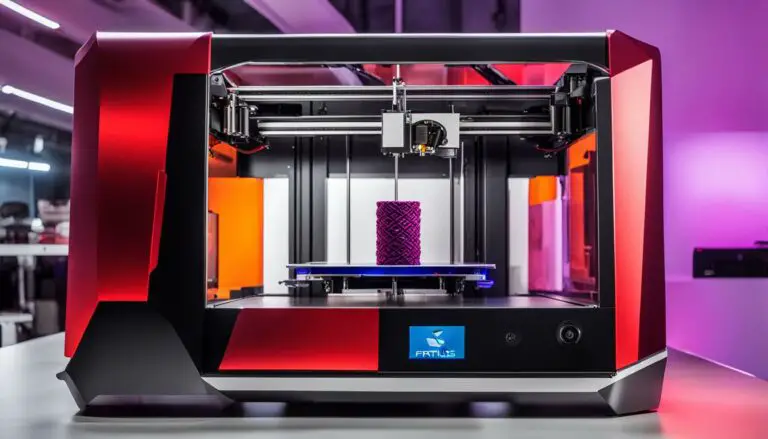
But first, let’s talk about the Ultimaker 3D printer itself. The Ultimaker is widely regarded as one of the best 3D printers available. With its exceptional features and professional-grade performance, it has become a favorite among makers, designers, and engineers worldwide. In our comprehensive review, we will explore its functionalities, price range, and unique features that set it apart from other 3D printers.
Now, let’s dive into the step-by-step process of mastering the Ultimaker 3D printer.
Key Takeaways:
- Prepare your design using slicing software like Ultimaker Cura.
- Set up your Ultimaker 3D printer, considering material choices and automation features.
- Send your print file to the printer and monitor the progress.
- Ensure you have the essential items for 3D printing, such as software, consumables, and tools.
- With the right knowledge and tools, you can achieve high-quality prints and become proficient in using the Ultimaker 3D printer.
Benefits of using Ultimaker Cura
- Easy import and adjustment of design files
- Preconfigured settings for quick print file preparation
- Hundreds of custom settings for advanced control
- Optimized for the Ultimaker 3D printer
Key features of Ultimaker Cura
| Feature | Description |
|---|---|
| Layer View | Visualize the print layers to identify potential issues |
| Print Setup | Configure print settings such as material, print speed, and infill density |
| Support Structures | Add or remove support structures to optimize print quality |
| Plugins | Extend the functionality of Ultimaker Cura with third-party plugins |
Using Ultimaker Cura for preparing your design is a seamless experience. With its intuitive interface and powerful features, you can confidently transform your digital creations into physical objects. Whether you are a beginner or an experienced user, Ultimaker Cura provides the tools and flexibility you need to achieve exceptional 3D prints.
Setting Up Your Printer
To start using your Ultimaker 3D printer, you need to ensure that it is properly set up. This involves a few important steps to guarantee a smooth printing experience.
Material Choice
One of the first decisions you need to make is the choice of material for your prints. Different materials have different characteristics and properties, so it’s essential to select the right one for your specific project. Ultimaker offers a wide range of materials, including PLA, ABS, Nylon, and more, each with its own advantages and applications. Consider factors such as strength, flexibility, heat resistance, and compatibility with your printer when making your material choice.
Automation Features
Ultimaker 3D printers come equipped with advanced automation features that enhance convenience and ease of use. These features include preconfigured print profiles, which allow you to select the optimal settings for your material and print quality with just a few clicks. Additionally, the Ultimaker material spools are embedded with NFC chips, enabling automatic material detection and calibration for hassle-free printing. Take advantage of these automation features to simplify your printing process and achieve consistent, high-quality results.
Support and Service
When investing in a 3D printer, it’s crucial to ensure that you have access to comprehensive support and service. Ultimaker offers excellent customer support, with a global network of certified service partners and a dedicated support team. Should any issues arise during the setup or printing process, you can rely on their expertise and assistance to troubleshoot and resolve them quickly. Additionally, Ultimaker provides warranty coverage, giving you peace of mind and protection for your investment.
| Benefits of Setting Up Your Printer | Details |
|---|---|
| Optimal Print Results | Proper setup ensures that your printer is calibrated and ready to deliver accurate and high-quality prints. |
| Time and Cost Savings | Efficient setup minimizes the risk of errors and reprints, saving you time and materials in the long run. |
| Longevity of Your Printer | By following the recommended setup procedures, you can extend the lifespan of your Ultimaker 3D printer. |
With a well-configured and properly set up Ultimaker 3D printer, you are ready to move on to the next step of the printing process: sending your file to the printer and starting the print job. Stay tuned for the next section where we will guide you through this exciting process!
Sending Your File to the Printer and Printing
Once you have set up your Ultimaker 3D printer, it’s time to send your print file to the printer and start the printing process. Sending your file to the printer is a simple and straightforward process. You can do this by loading the file onto a data storage device, such as an SD card or USB drive, and inserting it into the printer.
If you are in a different location from your printer, you can take advantage of remote printing capabilities. This allows you to send your print file directly to a network-enabled printer without physically being present. Remote printing is especially convenient when you need to start a print while you are away or want to save time by preparing files in advance.
As your print job progresses, you may want to monitor its status. Some 3D printing platforms offer software that allows you to track the progress of your print job. You can view real-time updates on your computer or mobile device, giving you peace of mind and the ability to make adjustments if necessary.
| Benefits of Remote Printing | Benefits of Print Progress Monitoring |
|---|---|
|
|
“Remote printing is a game-changer for those who need to print from a different location. It saves time and effort by eliminating the need for physical proximity to the printer. With print progress monitoring, you can stay informed about the status of your print job and make adjustments if needed. It’s like having your personal 3D printing assistant.”
Example: Remote Printing Workflow
1. Prepare your design for printing using slicing software, such as Ultimaker Cura.
2. Save the print file to an SD card or USB drive.
3. Insert the storage device into your Ultimaker 3D printer.
4. Access the printer’s interface and navigate to the file explorer.
5. Locate the print file and select it to initiate the printing process.
By following these simple steps, you can send your file to the printer and start the printing process, whether you are physically present or using remote printing capabilities. With print progress monitoring, you can stay connected to your print job and ensure successful results.
What You Need to 3D Print
To start 3D printing with your Ultimaker printer, there are a few essential items you’ll need. Let’s take a look at each one:
1. 3D Printer
The first thing you’ll need is the 3D printer itself. The Ultimaker 3D printer is a top-of-the-line option for both professionals and hobbyists. It comes with everything you need to get started right out of the box.
2. Software
Next, you’ll need software for preparing and managing your print jobs. There are two types of 3D printing software you’ll need:
- Print Preparation Software: This software helps you prepare your design for printing. It converts your design into a format the printer can understand, and allows you to adjust parameters such as material choice and layer height. One popular software is Ultimaker Cura, which comes with preconfigured settings to make the preparation process quick and easy.
- Printer Management Software: This software helps you manage your printer and monitor the printing process. It allows you to send your print file to the printer, track the progress of your print job, and make any necessary configuration changes. Ultimaker printers come with their own printer management software, providing a seamless printing experience.
3. Consumables
In addition to the printer and software, you’ll need a few consumables to ensure smooth printing:
- Materials: Depending on your printing needs, you’ll need different types of materials, such as PLA, ABS, or TPU. Ultimaker printers are compatible with a wide range of materials, giving you the freedom to choose the best one for your project.
- Maintenance Supplies: To keep your printer in good condition, you may need oil or grease for lubrication, as well as adhesive aids for the build surface.
4. Tools
Having the right tools can make your 3D printing experience much easier:
- Configuration Tools: Depending on your specific printer model, you may need basic tools for making configuration changes, such as adjusting nozzle size or replacing parts.
- Post-Processing Tools: After your print is finished, you may need tools for post-processing, such as removing support structures or smoothing rough edges.
5. Peripherals
Finally, you may want to consider peripherals that can add more functionality to your printer:
- Enclosures: An enclosure can help maintain a stable printing environment by controlling temperature and reducing noise.
- Material Stations: A material station can automate material changeovers and ensure a continuous printing process.
By having all these essentials, you’ll be well-equipped to start 3D printing with your Ultimaker printer and unlock your creativity.
Conclusion
Mastering the Ultimaker 3D printer is an exciting journey into the world of 3D printing. By following a step-by-step process, you can easily create high-quality prints and unleash your creativity. Whether you are a professional or a hobbyist, the Ultimaker 3D printer offers a range of features that make it an ideal choice for all your printing needs.
Throughout this guide, we have explored the key steps in using the Ultimaker 3D printer, from preparing your design to monitoring the printing process. With the right tools and knowledge, you can become proficient in 3D printing and achieve outstanding results.
Remember, the Ultimaker 3D printer provides excellent material compatibility, automation features, and comprehensive support. It is designed to make your printing experience enjoyable and hassle-free. So, embrace the world of 3D printing and start mastering the Ultimaker 3D printer today!
FAQ
How do I prepare my design for 3D printing?
You can prepare your design for 3D printing by using slicing software, such as Ultimaker Cura, to translate your design into a format the printer can understand.
What is Ultimaker Cura?
Ultimaker Cura is slicing software that allows you to prepare your design for 3D printing. It comes with preconfigured settings and allows you to adjust parameters such as material and layer height.
What do I need to set up my Ultimaker 3D printer?
To set up your Ultimaker 3D printer, you need to ensure you have the right material loaded and choose the appropriate nozzle size. It’s also important to consider the automation features, material compatibility, and support and service options.
How do I send my file to the printer?
You can send your print file to the printer by loading it onto a data storage device and inserting it into the printer. Alternatively, you can also send the file remotely to a network-enabled printer.
Can I monitor the progress of my print job?
Yes, some 3D printing platforms allow you to monitor your print job, either through software or via a webcam feed, providing real-time progress updates.
What do I need to 3D print?
To 3D print with your Ultimaker printer, you will need the 3D printer itself, software for preparing and managing print jobs, materials, maintenance supplies, adhesive aids, and basic tools for configuration changes or post-processing. Peripherals like enclosures or material stations can also add more functionality.