Expert Guide: How to Fix a Printer That Won’t Print
Originally posted on October 31, 2023 @ 3:41 am
Encountering a non-functioning printer can cause significant inconvenience and annoyance. Whether it is needed for professional or personal purposes, a malfunctioning printer can hinder productivity. However, do not despair! In this informative expert manual, we will offer practical strategies for resolving common printer problems and restoring seamless printing capabilities.
Key Takeaways:
- Learn how to troubleshoot and fix common printer issues
- Discover practical solutions for paper jams, driver problems, and connectivity issues
- Understand how to add a printer in Windows 10
- Find out how to print a self-test page to diagnose printer problems
- Resolve issues with print queue backlog and Wi-Fi connection
Troubleshooting Paper Jams and Ghost Jams
One common issue that can prevent your printer from printing is a paper jam. To resolve this problem, start by checking the paper tray to ensure that the paper is properly aligned. Misaligned paper can cause jams, so make sure it is placed correctly. Additionally, check for any obstructions such as torn pieces of paper or foreign objects that may be causing the jam.
If you encounter a persistent paper jam message on your printer, it might be a ghost jam. Ghost jams occur when residue from previous paper jams interferes with the printer’s operation. To fix this issue, you need to clear any debris or residue from the gears and rollers inside the printer. Carefully open the printer and clean the affected areas with a lint-free cloth or brush, removing any remnants of paper or ink.
| Common Causes of Paper Jams: | Solutions: |
|---|---|
| Paper not properly aligned in the tray | Make sure the paper is aligned correctly in the tray |
| Torn pieces of paper or foreign objects in the printer | Remove any obstructions from the printer |
| Residue from previous paper jams | Clean the gears and rollers inside the printer |
| Damaged or worn-out paper rollers | Replace the paper rollers if necessary |
By following these troubleshooting steps, you can effectively address paper jams and ghost jams to get your printer back up and running smoothly.
Fixing Printer Driver Problems
One of the common reasons for a printer not printing is an issue with the printer driver. The printer driver is a piece of software that allows your computer to communicate with the printer. If the driver is outdated or incompatible, it can cause the printer to malfunction. Luckily, there are steps you can take to fix this problem.
The first step is to check for driver updates on the manufacturer’s website. They often release updates to address any known issues and improve compatibility with different operating systems. Downloading and installing the latest version of the printer driver for your specific printer model can help resolve driver-related problems.
If updating the driver doesn’t solve the issue, you can try uninstalling and reinstalling the driver. Sometimes, the driver files can become corrupted or conflicts may arise. By removing the existing driver and reinstalling a fresh copy, you can ensure a clean installation that may fix any driver-related issues.
Table: Troubleshooting Printer Driver Problems
| Issue | Solution |
|---|---|
| Outdated or incompatible driver | Check manufacturer’s website for driver updates and install the latest version |
| Corrupted driver files | Uninstall the existing driver and reinstall a fresh copy |
| Incompatible driver with the operating system | Ensure that the driver is compatible with your operating system |
It’s important to ensure that you have the correct driver installed for your printer model and that it is compatible with your operating system. Using an incompatible driver can lead to various issues, including the printer not printing. By following these troubleshooting steps and ensuring your printer has the correct driver, you can resolve many driver-related problems and get your printer back to working smoothly.
Adding a Printer in Windows 10
Adding a printer to your Windows 10 computer is a simple process that can be done in just a few steps. Here’s a guide on how to connect a printer and set it up as your default device.
Step 1: Open the Settings Menu
To begin, click on the Start Menu and select the gear icon to open the Settings menu. Alternatively, you can press the Windows key + I on your keyboard to quickly access the Settings menu.
Step 2: Access the Printers & Scanners Section
Within the Settings menu, select the “Devices” option. This will open a new window where you can manage various devices connected to your computer. From the left-hand menu, choose “Printers & Scanners.”
Step 3: Add a Printer
In the Printers & Scanners window, click on the “Add a printer or scanner” button. Windows will then search for available printers connected to your computer or network. Wait for the search to complete.
Step 4: Connect Your Printer
Once the search is complete, you will see a list of available printers. Select the printer you want to add from the list. If your printer is not listed, make sure it is turned on and connected to your computer or network. You may need to follow additional prompts to complete the connection process.
Step 5: Set the Printer as Default
After successfully connecting your printer, Windows will ask if you want to set it as the default device. If you plan on using this printer as your primary printing device, click on the “Set as default printer” option. This will ensure that print jobs are sent to this printer by default.
That’s it! You have successfully added a printer in Windows 10 and set it up as your default device. You can now test the printer by printing a document or a test page to ensure everything is functioning properly.
Printing a Self-Test Page
When troubleshooting printer issues, printing a self-test page or a printer status report can provide valuable insights into the printer’s functionality and help diagnose any potential problems. This test page displays important information such as ink or toner levels, connectivity status, and other key printer settings. By interpreting the results, you can pinpoint the root cause of the printing issue and take appropriate actions to resolve it.
To print a self-test page, follow the instructions provided by your printer manufacturer. Usually, you can access this feature through the printer’s control panel or by pressing specific buttons on the printer itself. Once initiated, the printer will generate a test page containing the necessary information.
“The self-test page is a diagnostic tool that provides a snapshot of your printer’s overall health. It can help identify issues such as clogged printheads, low ink levels, or misaligned cartridges. By understanding the self-test page results, you can effectively troubleshoot and resolve common printer problems.”
Interpreting the self-test page results can vary depending on the printer model and manufacturer. However, some common elements you might find on the self-test page include:
- Printer status: This section indicates whether the printer is in a ready state or encountering any errors.
- Ink or toner levels: It provides an overview of the remaining ink or toner in each cartridge. Low ink or toner levels could be a potential cause for print quality issues.
- Connectivity status: The self-test page may display the printer’s current connectivity status, such as Wi-Fi signal strength or Ethernet connection status.
- Print settings: This section showcases the current print settings, including page size, print quality, and paper type. Verifying these settings can help ensure that they match your intended print job.
| Printer Status | Ink or Toner Levels | Connectivity Status | Print Settings |
|---|---|---|---|
| Ready | Black: 70% Cyan: 50% Magenta: 40% Yellow: 80% | Wi-Fi: Excellent | Page Size: Letter Print Quality: Best Paper Type: Plain |
By reviewing the self-test page results, you can identify any discrepancies or abnormalities that could be affecting your printer’s performance. From there, you can take appropriate steps to address the specific issues, whether it’s replacing low ink or toner cartridges, resolving connectivity problems, or adjusting print settings to match your requirements.
Resolving Print Queue Backlog
If you’re facing the frustration of your printer not printing, a possible culprit could be a backlog in the print queue. This backlog occurs when there are pending print jobs that prevent new documents from being processed and printed. Fortunately, clearing the print queue is a simple solution to get your printer back up and running.
To clear the print queue, follow these steps:
- Access the printer properties menu on your computer.
- Look for the print queue tab or option.
- Review the list of pending print jobs.
- Cancel any print jobs that are no longer needed or are causing issues.
Once you’ve cleared the print queue, your printer should be able to process new print jobs without any problems. It’s important to regularly check and clear the print queue to ensure smooth printing operations.
If you’re unsure how to access the print queue or need further assistance, consult your printer’s user manual or visit the manufacturer’s support website for detailed instructions.
| Common Steps to Clear Print Queue |
|---|
| Step 1: Access printer properties menu |
| Step 2: Locate the print queue tab or option |
| Step 3: Review pending print jobs |
| Step 4: Cancel unnecessary or problematic print jobs |
By clearing the print queue, you can ensure that your printer is ready to handle new print jobs efficiently and avoid any backlog that may hinder its performance. Keep your print queue clean, and you’ll experience smooth printing operations every time.
Troubleshooting Wi-Fi Connection Issues
Having trouble connecting your wireless printer to your Wi-Fi network? Don’t worry, we’ve got you covered. Below are some practical steps you can take to troubleshoot and resolve common Wi-Fi connection issues with your printer.
1. Check Your Wi-Fi Connection
The first step is to ensure that your printer is connected to the correct Wi-Fi network. Verify that you are connected to the same network that your printer is configured for. If you are unsure, you can check the network name and password on your printer’s display or through its control panel.
2. Verify Router Settings
Next, check your router settings to ensure that they are properly configured for your printer. Make sure that your router is broadcasting a stable Wi-Fi signal and that it is not experiencing any connectivity issues. You may want to try restarting your router to refresh the connection. Additionally, disabling any VPN connections that may be interfering with your printer’s communication is recommended.
3. Assign a Static IP Address
If you continue to experience issues, you can try assigning a static IP address to your printer. This can help prevent any IP conflicts that may be causing connectivity problems. Refer to your printer’s manual or the manufacturer’s website for specific instructions on how to assign a static IP address. It’s important to note that this step may vary depending on your printer model and network setup.
By following these troubleshooting steps, you can resolve common Wi-Fi connection issues with your wireless printer. If the problem persists, it is recommended to consult the printer’s manual or reach out to the manufacturer’s support for further assistance.
| Wi-Fi Connection Issues Troubleshooting Tips |
|---|
| Check if your printer is connected to the correct Wi-Fi network. |
| Verify your router settings and make sure they are properly configured. |
| Assign a static IP address to your printer to prevent IP conflicts. |
Resolving “Low Ink” or “Toner” Messages
One common issue that can prevent your printer from printing is low ink or toner levels. When you receive a “low ink” or “low toner” message, it’s important to take action to ensure uninterrupted printing. Here are some steps you can take to address this problem:
- Check ink or toner levels: Access your printer’s settings or control panel to check the ink or toner levels. This will give you an idea of how much ink or toner is remaining and whether it needs to be refilled or replaced.
- Refill or replace ink/toner: If the ink or toner levels are low, it’s time to refill or replace them. Follow the manufacturer’s instructions to properly refill ink cartridges or replace toner cartridges. Be sure to use genuine cartridges or high-quality compatible ones for optimal performance.
- Override low ink/toner message: Some printers have an option to override the “low ink” or “low toner” message and continue printing. Refer to your printer’s manual or settings to find out if this feature is available and how to enable it. Keep in mind that overriding the message may affect print quality if the ink or toner is indeed low.
By regularly checking and maintaining your printer’s ink or toner levels, you can avoid interruptions in your printing tasks. Remember to follow the manufacturer’s guidelines for proper ink or toner replacement and use high-quality cartridges to ensure optimal print quality.
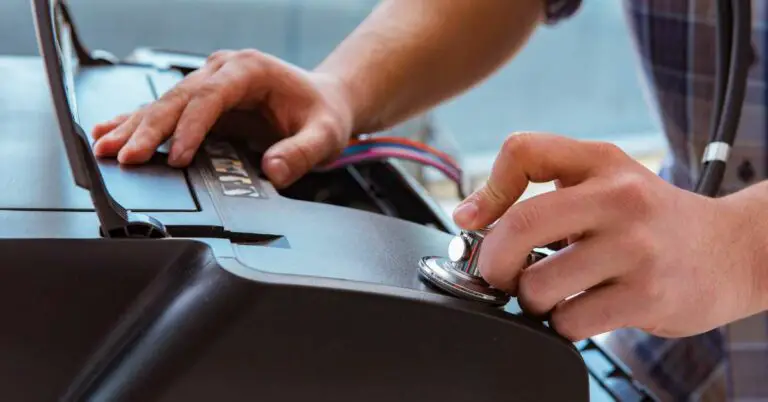
Addressing Hardware Issues
When all else fails and your printer still won’t print, it’s possible that there may be an underlying hardware issue. In such cases, it is recommended to contact the manufacturer’s support or seek professional printer repair services. These experts have the knowledge and experience to diagnose and fix any hardware problems that may be affecting your printer’s functionality.
Professional printer service technicians are equipped with specialized tools and equipment to identify and repair hardware issues. They can assess the printer’s internal components, such as the printhead, fuser, or paper feed mechanism, to determine the cause of the problem. Whether it’s a faulty part that needs replacement or a more complex repair, these professionals can provide the necessary solutions.
While seeking professional printer service may involve additional costs, it can save you time, effort, and frustration in the long run. Attempting to fix complex hardware issues without the required expertise may lead to further damage or even render the printer irreparable. By relying on professional help, you can ensure that your printer receives the necessary care and get it back up and running smoothly.
| Benefits of Professional Printer Service | Drawbacks of Attempting DIY Repairs |
|---|---|
|
|
“When faced with hardware issues, it’s best to leave the repairs to the professionals. They have the necessary expertise and resources to diagnose and fix complex printer problems, ensuring optimal performance and longevity.” – Printer Repair Specialist
Setting Correct Printer Defaults
When it comes to printing, it’s important to ensure that the correct printer is set as the default device on your computer. This ensures that print jobs are sent to the intended printer without any confusion or delays. To do this, you need to check and adjust your computer’s printer settings. Below are the steps for setting the default printer on both Windows and macOS.
Setting Default Printer on Windows
- Click on the Start menu and select “Settings”.
- In the Settings window, click on “Devices”.
- From the left-hand menu, select “Printers & scanners”.
- Scroll down to the section titled “Printers & scanners” and click on the printer you want to set as the default.
- Click on “Manage” and then select “Set as default”.
By following these steps, you can ensure that the printer you want to use is set as the default device on your Windows computer.
Setting Default Printer on macOS
- Click on the Apple menu and select “System Preferences”.
- In the System Preferences window, click on “Printers & Scanners”.
- From the left-hand menu, select the printer you want to set as the default.
- Click on the “Options & Supplies” button.
- In the “Options & Supplies” window, click on the “General” tab.
- Click on the “Default Printer” dropdown menu and select the printer you want to set as the default.
By following these steps, you can ensure that the correct printer is set as the default device on your macOS computer.
Setting the correct printer defaults is essential for a seamless printing experience. By making sure that your desired printer is set as the default, you can avoid any unnecessary confusion and ensure that your print jobs are sent to the right place. Take a few moments to check and adjust your printer settings, and you’ll be ready to print with confidence!
Clearing Print Queue in macOS
If you’re using macOS and experiencing issues with your printer’s print queue, don’t worry. Clearing the print queue in macOS is a straightforward process that can help resolve any pending print jobs. Follow the steps below to remove print jobs from the queue and allow new print jobs to be processed and printed.
Step 1: Open System Preferences
To begin, open System Preferences on your Mac. You can do this by clicking on the Apple menu in the top-left corner of your screen and selecting “System Preferences” from the dropdown menu.
Step 2: Navigate to Printers & Scanners
In the System Preferences window, locate and click on the “Printers & Scanners” icon. This will open the Printers & Scanners preferences panel, where you can manage your connected printers.
Step 3: Select the Printer and Remove Print Jobs
In the Printers & Scanners preferences panel, you’ll see a list of the printers connected to your Mac. Select the printer that has pending print jobs in the queue. Once you’ve selected the printer, you’ll see a list of all the active print jobs.
To remove the print jobs from the queue, simply click on the print job and press the “Delete” or “X” button. Repeat this step for all the print jobs you wish to remove. Once all the print jobs are cleared, your printer’s queue will be empty, allowing new print jobs to be processed.
By following these steps, you can easily clear the print queue in macOS and ensure smooth printing functionality. Remember to regularly check the print queue and remove any pending print jobs to avoid any potential issues.
| Step | Description |
|---|---|
| Step 1 | Open System Preferences on your Mac. |
| Step 2 | Navigate to the “Printers & Scanners” preferences panel. |
| Step 3 | Select the printer with pending print jobs and remove them from the queue. |
Conclusion
Resolving printer issues and troubleshooting common problems can be a daunting task, but with the right steps, you can get your printer back up and running. By following the expert guide and implementing the solutions outlined in this article, you can fix most printer-related issues on your own.
Remember to regularly update your printer drivers, as outdated or incompatible drivers can cause malfunctions. Additionally, performing basic maintenance such as clearing paper jams, checking ink or toner levels, and clearing the print queue can help resolve common issues.
If you’ve exhausted all troubleshooting steps and your printer still won’t print, it’s recommended to seek professional help or contact the manufacturer’s support. They have the expertise to diagnose and fix hardware problems that may be affecting your printer’s performance.
With the tips and techniques provided in this guide, you can tackle printer problems with confidence and ensure that your printing tasks are completed smoothly. Happy printing!
FAQ
How do I fix a printer that won’t print?
Follow the troubleshooting steps outlined in this expert guide to address common printer issues.
How do I resolve a paper jam in my printer?
Make sure the paper is properly aligned, check for obstructions, clear the paper queue, and ensure the paper type setting matches your print job.
What should I do if my printer is experiencing ghost jams?
Clear debris from the gears and rollers to resolve ghost jams caused by residue from previous paper jams.
How can I fix printer driver problems?
Check for driver updates on the manufacturer’s website, download the latest version for your printer model, and ensure compatibility with your operating system.
What is the process of adding a printer in Windows 10?
Navigate to the Settings menu, select Devices, then Printers & Scanners, and click on Add Printer. Follow the prompts to connect your printer and set it as the default device.
How can I print a self-test page to diagnose printer issues?
Follow the instructions provided by your printer manufacturer to print a self-test page or printer status report.
What should I do if there is a backlog in my print queue?
Access the print queue in the printer properties menu and cancel any pending print jobs to allow new print jobs to be processed and printed.
How do I troubleshoot Wi-Fi connection issues with my wireless printer?
Ensure your printer is connected to the correct Wi-Fi network, configure router settings properly, and disable interfering VPN connections if necessary. You can also assign a static IP address to your printer.
How can I address “low ink” or “toner” messages preventing printing?
Check ink or toner levels, refill or replace as needed, and consider overriding the low ink or toner message to continue printing.
What should I do if none of the troubleshooting steps work?
Contact the manufacturer’s support or seek professional printer repair services to diagnose and fix any hardware issues.
How do I ensure the correct printer is set as the default device on my computer?
Check your computer’s settings, both on Windows and macOS, and verify that the active printer is set as the default.
How do I clear the print queue in macOS?
Open the Printers & Scanners section in System Preferences, select the printer, and remove any pending print jobs to allow new print jobs to be processed and printed.