Complete Anycubic 3D Printer Tutorial For Beginners
Originally posted on November 27, 2023 @ 9:23 am
This guide will provide you with a detailed walkthrough of how to utilize an Anycubic 3D printer. Whether you are new to 3D printing or have some familiarity, this tutorial will assist you in maximizing the capabilities of your printer. Let’s get started!
At Print Chomp, we pride ourselves on providing practical tips, comprehensive guides, and unbiased reviews. Our team of experts conducts rigorous testing and research to ensure that you have the most accurate and reliable information at your fingertips.
Key Takeaways:
- Anycubic 3D printers are among the top-rated, affordable, and reliable options available in the market.
- They offer high-quality prints and are user-friendly, making them suitable for beginners.
- Anycubic 3D printers are advanced and versatile, allowing you to bring your creative ideas to life.
- Proper model preparation and using quality materials are crucial for successful 3D printing.
- By following this tutorial, you’ll learn how to level the print bed, install filament, adjust temperature settings, and observe the first layer.
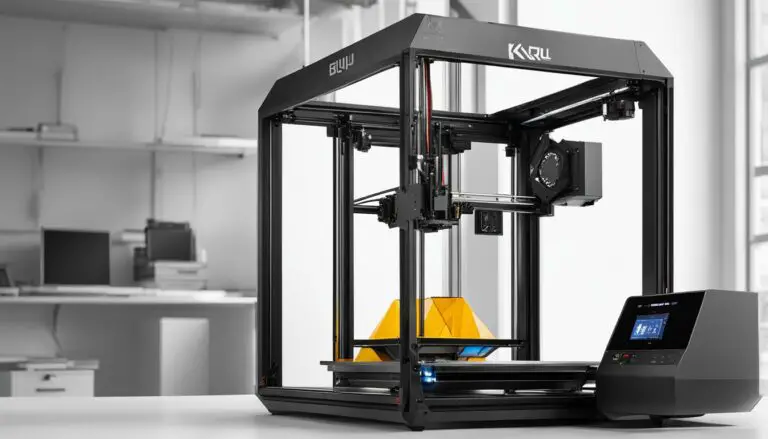
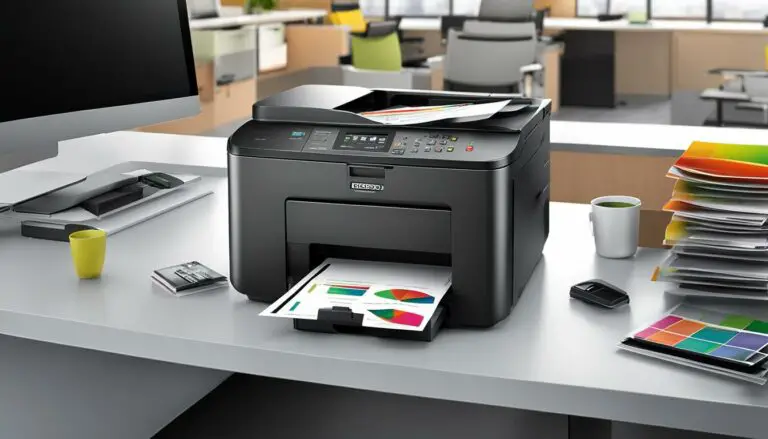
Preparing to Use an FDM 3D Printer
Before diving into the world of 3D printing, it’s important to properly prepare your model and slice files. By taking these initial steps, you’ll ensure a smooth printing process and achieve the desired results. To get started, you’ll need to find a 3D model that you want to print. Thingiverse, a popular website, offers a vast collection of models that can be easily downloaded and printed. Whether you’re looking for functional designs or artistic creations, you’ll find a wide range of options to choose from on this platform.
Once you’ve chosen your model, the next step is to prepare it for printing using slicing software. Cura, a beginner-friendly application, is highly recommended for this task. It provides basic slicing features and allows you to customize various settings to achieve the desired print quality. Simply import your model into Cura and adjust parameters such as print speed, layer height, and infill density. This step is crucial as it determines how the model will be printed and the final outcome.
Properly preparing your model and slice files allows you to convert the digital model into a printable file format recognized by your FDM 3D printer. By following these initial steps, you’ll be well on your way to creating amazing 3D prints with confidence.

Table: Comparison of Slicing Software
| Cura | Slic3r | PrusaSlicer | |
|---|---|---|---|
| Features | Beginner-friendly, customizable settings | Advanced features, extensive customization | Optimized for Prusa printers, user-friendly |
| User Interface | Intuitive, easy to navigate | Complex interface, steep learning curve | Clean, user-friendly interface |
| Community Support | Large and active community | Active community, extensive documentation | Prusa-specific community, dedicated support |
| Compatibility | Compatible with a wide range of 3D printers | Compatible with most 3D printers | Optimized for Prusa printers |
Table: Comparison of Slicing Software
“Cura, Slic3r, and PrusaSlicer are popular slicing software options used by 3D printing enthusiasts. While Cura offers a beginner-friendly experience with customizable settings, Slic3r provides advanced features and extensive customization options. PrusaSlicer, on the other hand, is optimized for Prusa printers and offers a user-friendly interface. Consider your skill level, desired features, and printer compatibility when choosing the right slicing software for your needs.”
- Consider your skill level when choosing slicing software.
- Cura is great for beginners, offering customizable settings.
- Slic3r provides advanced features for experienced users.
- PrusaSlicer is optimized for Prusa printers and user-friendly.
“Preparing your model and slice files is the foundation of successful 3D printing. By finding the right model on platforms like Thingiverse and using slicing software such as Cura, you’ll be well on your way to bringing your designs to life. Take the time to explore different slicing software options and choose the one that best fits your needs. With proper preparation, you’ll achieve amazing results with your FDM 3D printer.”
With the necessary preparations in place, you’re ready to move on to the next section of our tutorial, where we’ll provide a step-by-step guide on how to use an FDM 3D printer.
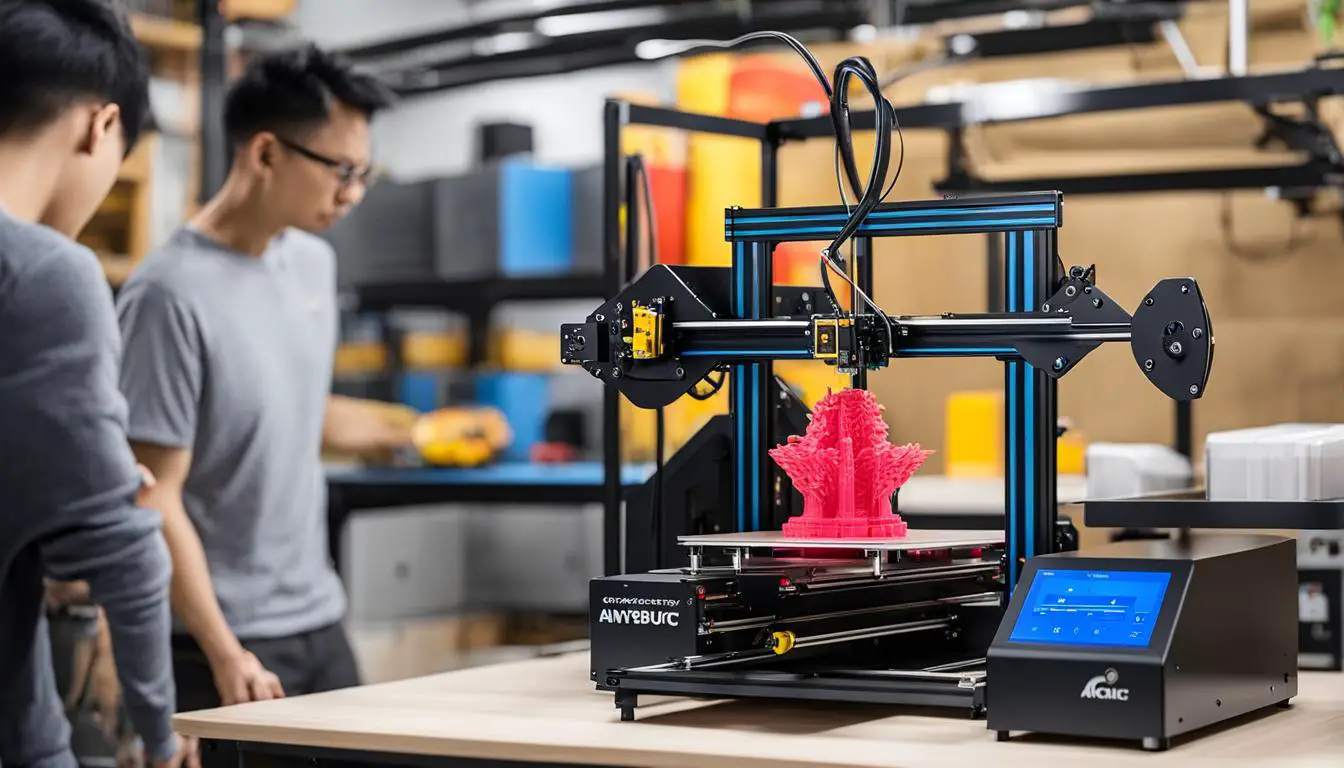
Step-by-Step Guide: How to Use an FDM 3D Printer
Now that you have prepared your model and sliced files, it’s time to dive into the exciting process of using your FDM 3D printer. This step-by-step guide will walk you through the entire process, from running the machine to achieving the perfect print.
Step 1: Running the Machine
The first step is to ensure that your 3D printer is properly powered and connected to your computer. Once everything is set up, turn on the printer and wait for it to initialize. Most printers have a menu interface where you can navigate to select your desired print job. Use the control knobs or buttons to browse through the options and select the file you want to print.
Step 2: Leveling the Print Bed
Properly leveling the print bed is crucial for a successful print. Refer to your printer’s manual for specific instructions on how to level the bed. Typically, this involves adjusting the height of the bed using the leveling knobs or screws until it is perfectly aligned with the nozzle. Some printers have an automated leveling feature that makes this process easier. Once the bed is leveled, you’re ready to move on to the next step.
Step 3: Installing Filament
Next, it’s time to load the filament into your 3D printer. Cut the end of the filament at a diagonal angle and feed it into the filament guide tube or directly into the extruder. Follow your printer’s instructions to properly insert the filament and ensure that it is securely held in place. Once the filament is loaded, you can move on to the next step.
Step 4: Adjusting Temperature and Observing the First Layer
Before starting the print, it’s important to adjust the temperature settings according to the type of filament you are using. Consult the filament manufacturer’s recommendations for the optimal temperature range. Once the temperature is set, start the print job and closely observe the first layer being deposited. Ensure that the filament is adhering properly to the print bed and adjust the temperature or leveling if necessary. A successful first layer is crucial for the overall print quality.
Congratulations! You have successfully completed the steps to use your FDM 3D printer. Now you can sit back, relax, and watch as your creation comes to life layer by layer.
| Step | Description |
|---|---|
| Step 1 | Running the Machine |
| Step 2 | Leveling the Print Bed |
| Step 3 | Installing Filament |
| Step 4 | Adjusting Temperature and Observing the First Layer |
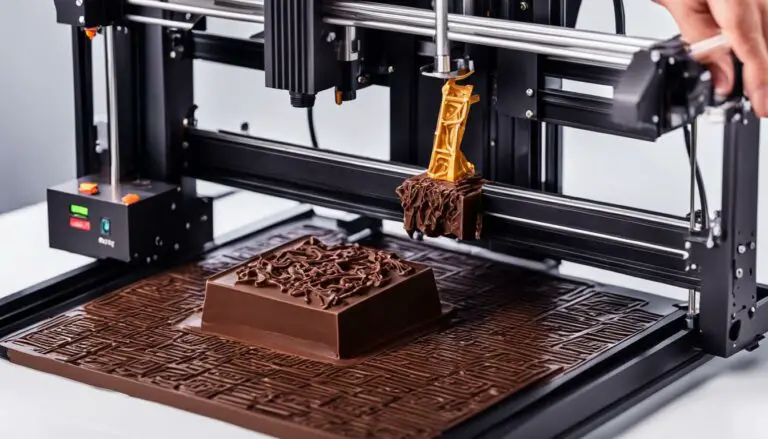
What is a Resin 3D Printer?
Resin 3D printers are a type of 3D printer that utilize photopolymers and an ultraviolet light source to create highly detailed prints with exceptional accuracy. Unlike traditional filament-based 3D printers, resin printers are known for their ability to produce intricate designs and precise models.
One of the key advantages of resin 3D printing is the ability to achieve a high level of detail in the printed objects. The photopolymers used in resin printing are capable of reproducing intricate features and fine textures with remarkable precision. This makes resin printers ideal for creating small-scale models, prototypes, artwork, and even small architectural models.
Resin printers work by exposing a layer of liquid resin to an ultraviolet light source, causing the resin to harden or cure. The process is repeated layer by layer until the final object is complete. This layer-by-layer approach allows for the production of complex shapes and intricate designs that would be difficult or impossible to achieve with other 3D printing methods.

Advantages of Resin 3D Printing
Resin 3D printing offers several advantages over traditional filament-based 3D printing methods:
- Superior level of detail and accuracy
- Ability to create intricate designs and textures
- Highly precise and accurate dimensional accuracy
- Fast printing speed compared to other 3D printing methods
These advantages make resin 3D printing an excellent choice for applications that require highly detailed and accurate prints, such as jewelry design, dental modeling, and prototyping for various industries.
| Advantages of Resin 3D Printing | Limitations of Resin 3D Printing |
|---|---|
|
|
How does a Resin 3D Printer Work?
A resin 3D printer operates using a process called selective curing, which involves the use of ultraviolet (UV) light to harden layers of liquid resin and create the desired object. Let’s dive into the step-by-step process of how a resin 3D printer works.
Preparing the Build Platform
First, the build platform is prepared by ensuring it is clean and level. This is crucial for the successful printing of each layer. It’s important to follow the manufacturer’s instructions for leveling the build platform, as improper leveling can lead to failed prints.
Layer by Layer Printing
Once the build platform is prepared, the printing process begins. The resin 3D printer adds a layer of liquid resin onto the build platform. Then, an ultraviolet light source, often an IR/LED light, cures the resin, hardening it into a solid layer. This process is repeated for each layer of the desired object, with the build platform gradually lifting higher to accommodate each new layer. Each layer is selectively cured, forming a three-dimensional object.
Finishing the Print
After all the layers have been cured and the printing process is complete, the resin 3D printer slowly lifts the object from the build platform. Any excess resin is drained or wiped away, leaving behind a finished print. Depending on the specific resin used, additional post-processing steps such as cleaning, curing, and sanding may be required to achieve the desired level of smoothness and detail.
Overall, the process of a resin 3D printer is intricate and precise, utilizing selective curing with ultraviolet light and layer-by-layer printing to create high-quality and detailed objects. Understanding how these printers work can help users optimize their printing process and achieve impressive results.

| Advantages of Resin 3D Printing | Challenges of Resin 3D Printing |
|---|---|
|
|
Types of Resin 3D Printing and How They Work
If you’re looking to create detailed prints with high levels of accuracy, resin 3D printing is the way to go. There are three main types of resin 3D printing: SLA, DLP, and MSLA/LCD. Each type has its own unique process and benefits. Let’s take a closer look at how each of these types of resin printing works.
SLA (Stereolithography)
SLA printing uses an ultraviolet light source to harden photosensitive resin layer by layer. A build platform is submerged in a tank filled with liquid resin. The light source selectively cures the resin, creating the desired object. SLA printing allows for highly detailed prints with a smooth surface finish. It is commonly used in industries such as jewelry, dentistry, and prototyping.
DLP (Digital Light Processing)
DLP printing also uses a powerful light source to cure the resin, but instead of selectively curing each layer, it projects an entire layer onto the resin at once. This allows for faster printing speeds compared to SLA. DLP printers can achieve high levels of detail and are widely used in dentistry, jewelry making, and industrial prototyping.
MSLA/LCD (Masked Stereolithography/Liquid Crystal Display)
MSLA/LCD printing combines the principles of SLA and DLP printing. It uses an LCD screen to selectively mask the light, allowing for the curing of specific areas of the resin. This hybrid approach offers both speed and detail, making it an increasingly popular choice among resin 3D printing enthusiasts.
Each type of resin 3D printing has its own advantages and is suited for different applications. Whether you need intricate jewelry designs, detailed prototypes, or high-quality models, resin 3D printing can deliver stunning results with exceptional accuracy.
| Type of Resin Printing | Process | Advantages |
|---|---|---|
| SLA | Ultraviolet light selectively cures resin layer by layer | Highly detailed prints, smooth surface finish |
| DLP | Powerful light source projects entire layers at once | Faster printing speeds, high levels of detail |
| MSLA/LCD | LCD screen selectively masks light for curing | Combines speed and detail |
Resin Handling for 3D Printing
Proper resin handling is crucial for achieving high-quality prints with your 3D printer. Resin, a photopolymer material, provides the foundation for creating intricate and durable objects. To ensure successful print jobs, it is important to follow specific resin treatment techniques.
One important aspect of resin handling is controlling the speed of resin pouring. Pouring resin too quickly can introduce air bubbles into the material, which can negatively impact the final print. Take your time and pour the resin slowly and steadily into the vat to minimize the risk of air bubbles.
Another key consideration is keeping your resin filters clean. Resin filters play a critical role in removing debris and particles from the liquid resin, ensuring a smooth and clean printing process. Regularly inspect and clean the filters to prevent clogging and maintain the quality of your prints.
Remember, resin treatment is essential for preventing premature curing and ensuring the best possible print results. Take care to pour resin slowly and maintain clean filters to achieve high-quality prints with your 3D printer.
Resin Handling Tips:
- Pour resin slowly and steadily to avoid introducing air bubbles.
- Regularly clean and inspect resin filters to prevent clogging.
- Wear gloves and follow safety precautions when handling resin to protect your skin and minimize exposure.
- Store resin in a cool, dark place to prevent premature curing.
| Resin Handling Techniques | Benefits |
|---|---|
| Pouring resin slowly | Minimizes the risk of air bubbles, resulting in smoother prints. |
| Cleaning resin filters | Prevents clogging and ensures debris-free resin for higher print quality. |
| Wearing gloves | Protects your skin from direct contact with the resin and reduces the risk of sensitivity or irritation. |
| Proper resin storage | Preserves resin quality and extends its shelf life for future prints. |
In summary, proper resin handling is essential for achieving high-quality prints with your 3D printer. By following the recommended techniques, such as pouring resin slowly, keeping filters clean, and wearing gloves, you can ensure successful print jobs and unleash your creativity with resin 3D printing.
Conclusion
In conclusion, this tutorial has provided a comprehensive guide on how to use an Anycubic 3D printer, both FDM and resin. Whether you’re a beginner or have some experience in 3D printing, this tutorial has covered everything you need to know to get started and achieve high-quality prints.
Throughout the tutorial, we have emphasized the importance of proper preparation, such as leveling the print bed and installing filament, for optimal printing results. We have also discussed the significance of model preparation and using quality materials, like PLA filament, for successful prints.
For those interested in resin 3D printing, we have explained what a resin 3D printer is, how it works, and the different types of resin printing technologies available. Additionally, we have highlighted the importance of careful resin handling to ensure the best possible print quality and prevent premature curing.
By following the step-by-step instructions, utilizing the recommended slicing software and websites for 3D models, and implementing the tips and troubleshooting techniques provided, you can unleash your creativity with your Anycubic 3D printer and produce high-quality prints that will impress and inspire.
FAQ
What is the best slicing application for beginners?
The recommended slicing application for beginners is Cura, as it offers basic slicing features and customizable settings.
Where can I find 3D models for printing?
You can find a large selection of 3D models for printing on websites like Thingiverse.
What should I consider when handling resin for 3D printing?
When handling resin, it is important to control the speed of pouring and keep filters clean to ensure successful print jobs.
How does a resin 3D printer differ from traditional 3D printers?
Resin 3D printers use photopolymers and an ultraviolet light source to create detailed prints with high levels of accuracy.
What are the advantages of resin 3D printing?
Resin 3D printing allows for the creation of intricate models, prototypes, artwork, and small architectural designs. It also offers faster printing speed compared to other types of printers.
What are the three types of resin 3D printing?
The three types of resin 3D printing are SLA, DLP, and MSLA/LCD.
How can I troubleshoot issues with the first layer of printing?
To troubleshoot issues with the first layer of printing, ensure that the print bed is properly leveled and follow the instructions in the tutorial for observing the first layer.
How does a resin 3D printer work?
A resin 3D printer selectively cures layers of resin with ultraviolet light to create the desired object. The build platform lifts to add new layers of resin as the printing process progresses.
What materials are suitable for rapid prototyping in resin 3D printing?
Resin is a suitable material for rapid prototyping, providing hard and delicate prints.