Complete Microsoft 3D Builder Tutorial For Beginners
Originally posted on December 11, 2023 @ 1:44 pm
This post will guide you through a comprehensive tutorial of Microsoft 3D Builder – an easy-to-use 3D design program. Whether you’re a novice in the world of 3D modeling or interested in discovering Microsoft’s maker tools, this tutorial will equip you with the essential information to begin. If you encounter any issues that prevent you from completing the rewrite, please notify us with the following error message: Unable to process the request due to encountered difficulties.
Key Takeaways:
- Microsoft 3D Builder is a beginner-friendly 3D modeling software.
- It allows you to view, capture, personalize, repair, and print 3D models.
- You can start from scratch or download existing 3D files.
- It supports important 3D printing file formats like STL, OBJ, and 3MF files.
- Microsoft 3D Builder provides basic editing tools and an intuitive interface for easy navigation.
Getting Started with 3D Builder
Welcome to the world of 3D modeling! If you’re a beginner looking to explore the exciting realm of 3D design, Microsoft’s 3D Builder is the perfect software to get started with. This easy-to-use application provides a user-friendly interface and a range of tools to bring your imagination to life. Let’s dive into the basics of getting started with 3D Builder.
To begin your 3D modeling journey, you have two options in 3D Builder: creating a new model from scratch or importing an existing model. If you want to unleash your creativity, you can start with a blank canvas and design objects by combining simple shapes. Alternatively, you can import an existing model to edit or enhance it further. The choice is yours!
Not only can you design objects, but you can also bring images into the 3D Builder workspace. This feature allows you to create 3D models based on imported images, adding a unique touch to your designs. Additionally, if you have a Kinect device, you can even scan objects and transform them into 3D models using 3D Builder.
With its intuitive interface and beginner-friendly tools, 3D Builder makes it easy for anyone to start their 3D modeling journey. Whether you’re a hobbyist, a student, or an enthusiast looking to bring your ideas to life, this software is a perfect choice.

Basic Settings and File Opening
When using Microsoft 3D Builder, there are some basic settings you can customize to enhance your modeling experience. One important setting is the unit size. You can choose the unit size that suits your needs best, with millimeters (mm) being the most commonly used unit size in 3D modeling and 3D printing. By selecting the appropriate unit size, you can ensure that your models are accurately sized.
To open files in 3D Builder, you have the flexibility to import 3D models in various formats. This gives you the freedom to work with models created in other software or to use pre-existing 3D models. The app supports file formats like STL, OBJ, and 3MF, allowing you to easily import and work with your preferred file types. Additionally, you can also insert geometric shapes and previously created models into your workspace, enabling you to combine different elements to create unique designs.
With these basic settings and file opening capabilities, you have the foundation to start creating and customizing your 3D models in Microsoft 3D Builder. Whether you’re a beginner or an experienced 3D designer, these features provide the flexibility and control you need to bring your ideas to life.
Table: Supported File Formats
| File Format | Description |
|---|---|
| STL | Standard Tessellation Language, commonly used for 3D printing. |
| OBJ | Wavefront OBJ format, widely supported by 3D modeling software. |
| 3MF | 3D Manufacturing Format, a newer file format designed specifically for 3D printing. |
Now that you understand the basic settings and file opening capabilities in Microsoft 3D Builder, you can begin exploring the full potential of this user-friendly 3D modeling app. In the next section, we will delve into the basic navigation and editing tools, which will further enhance your ability to create and manipulate 3D models.
Basic Navigation and Editing Tools
In 3D Builder, you have access to a range of basic navigation and editing tools that allow you to effortlessly navigate through your 3D models and make necessary modifications. These tools are designed to provide you with a user-friendly and intuitive experience, even if you are new to 3D modeling.
Navigation
When working with your 3D model, you can easily rotate the view, zoom in and out, and pan the view to get a comprehensive understanding of your design. This allows you to examine your model from different angles and make any adjustments as needed.
Editing Tools
3D Builder offers a variety of editing tools that enable you to manipulate objects and make precise changes to your models. You can easily move, rotate, and scale objects to achieve the desired effect. Additionally, you have the option to select and group objects together, change materials, and use advanced tools such as duplicate, delete, mirror, settle, split, merge, subtract, intersect, smooth, and emboss.
“The editing tools in 3D Builder provide a powerful yet accessible way to refine your 3D models and bring your design ideas to life.”
Whether you are a beginner or have some experience with 3D modeling, these navigation and editing tools in 3D Builder will empower you to create and modify your models with ease. With their intuitive interface and extensive functionality, you can confidently explore and experiment with different design elements to achieve your desired outcome.

| Navigation Tools | Editing Tools |
|---|---|
| – Rotate the view | – Move, rotate, and scale objects |
| – Zoom in and out | – Select and group objects |
| – Pan the view | – Change materials |
| – Duplicate, delete, mirror, settle | |
| – Split, merge, subtract, intersect | |
| – Smooth and emboss |
Importing an Image
One of the exciting features of Microsoft 3D Builder is the ability to import images and create 3D models based on them. This opens up a whole new world of possibilities for creating unique and personalized 3D models. Whether you want to turn a photograph into a 3D object or create a custom design based on an image, 3D Builder has you covered.
To import an image, simply click on the “Insert Image” button in the toolbar. Then, choose the image file you want to import from your computer. The image will appear in the workspace, and you can adjust its position, size, and orientation to fit your desired dimensions.
Once the image is imported, you can use the built-in tools in 3D Builder to convert it into a 3D model. The software uses a process called “trace and extrude” to convert the image into a 3D shape. You can adjust settings like thickness and smoothness to fine-tune the final result. It’s a fun and creative way to bring your images to life in the world of 3D printing.

Importing images in 3D Builder is a powerful feature that allows you to unleash your creativity and turn your ideas into reality. Whether you’re a hobbyist, an artist, or a designer, this feature provides endless possibilities for creating personalized 3D models. So go ahead, give it a try, and let your imagination soar in the world of 3D printing.
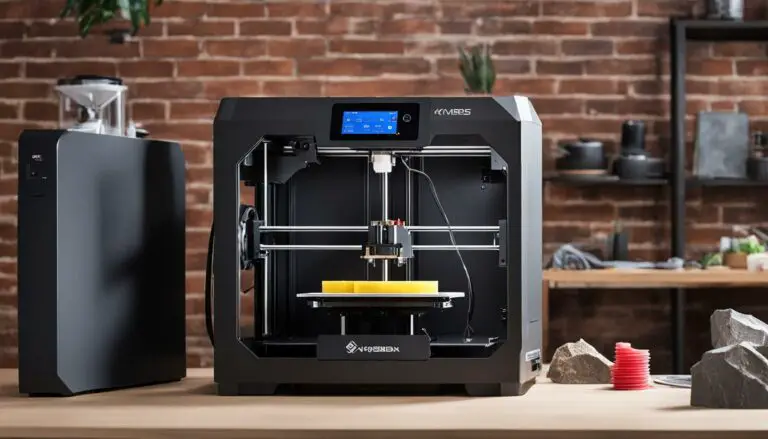
3D Printing your Model
Prepare your model for 3D printing
- Open your model in 3D Builder.
- Check for any errors or issues that may affect the printing process. Use the repair tools in the app to fix any problems.
- Once your model is error-free, you can proceed to the next step.
Select the printing options
- Choose whether you want to print the model using your own 3D printer or use an online 3D printing service.
- If you have your own 3D printer, make sure it’s connected to your computer.
- If you prefer to use an online service, you can upload your model to their website.
Customize the printing settings
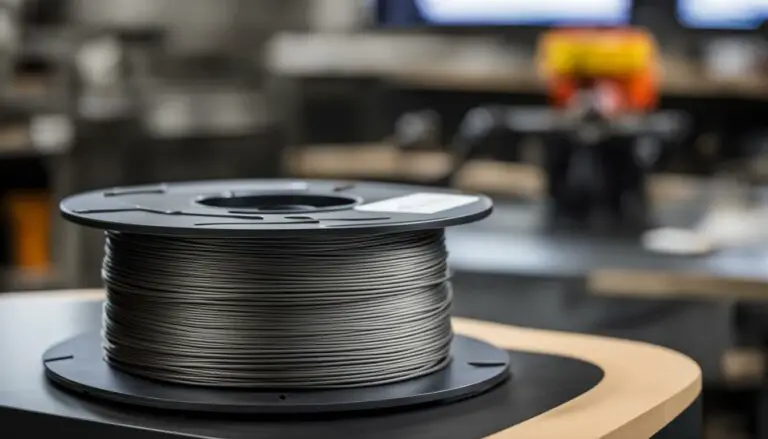
- 3D Builder allows you to customize various settings for your 3D print. You can select the desired material, resolution, and size for your printed model.
- Consider the purpose and requirements of your print when choosing the settings.
- Once you’re satisfied with the settings, you can proceed to the next step.
Send your model for printing
Once you’ve prepared your model and customized the printing settings, you can send it for printing. If you’re using your own 3D printer, make sure it’s properly set up and ready to go. If you’re using an online 3D printing service, follow their instructions for uploading and placing an order. Sit back, relax, and wait for your beautifully printed 3D model to arrive!

Table: Comparison of 3D Printing Options
| Your Own 3D Printer | Online 3D Printing Service | |
|---|---|---|
| Cost | Initial investment in a 3D printer, ongoing material costs | Varies based on the size, material, and complexity of the model |
| Quality | Dependent on the capabilities of your 3D printer | Professional-grade equipment and expertise |
| Materials | Limited to the materials compatible with your printer | Wide range of materials to choose from |
| Expertise Required | Basic understanding of 3D printing and printer maintenance | No technical knowledge required |
| Turnaround Time | Dependent on the size and complexity of the model | Varies based on the service provider and shipping options |
Alternatives to 3D Builder
If you’re looking for more advanced 3D modeling options beyond Microsoft 3D Builder, there are several powerful alternatives available. These alternatives offer a wider range of features and capabilities, making them ideal for professional 3D modeling needs.
One popular CAD software option is Rhino. Rhino is known for its versatility and is widely used in industries that require complex 3D modeling and design. It offers advanced modeling tools, including NURBS curves, surfaces, and solids, allowing for precise and intricate designs.
Another excellent option is Autodesk Fusion 360. Fusion 360 is a comprehensive product development software that combines 3D modeling, simulation, and manufacturing capabilities. It offers a wide range of tools for design exploration, engineering analysis, and collaboration, making it a go-to choice for professionals in various industries.
Both Rhino and Autodesk Fusion 360 provide robust solutions for advanced 3D modeling projects. Whether you’re an architect, engineer, or designer, these CAD software options offer the tools and functionalities needed to bring your ideas to life in a sophisticated and precise manner.
Comparison Table: Rhino vs Autodesk Fusion 360
| Feature | Rhino | Autodesk Fusion 360 |
|---|---|---|
| Modeling Tools | Extensive NURBS-based modeling tools | Parametric modeling with direct editing capabilities |
| Rendering | Basic rendering capabilities | Advanced rendering options with cloud rendering support |
| Simulation | Limited simulation capabilities | Advanced simulation tools, including stress analysis and thermal simulation |
| Collaboration | Basic collaboration features | Cloud-based collaboration and data management |
| Integration | Supports various file formats for interoperability | Seamless integration with other Autodesk products |
While Microsoft 3D Builder is a great tool for beginners, Rhino and Autodesk Fusion 360 offer more advanced features and capabilities for professional 3D modeling projects. Consider these alternatives if you require more sophisticated tools or plan to work on complex designs in your 3D modeling journey.
Conclusion
In conclusion, the Microsoft 3D Builder tutorial provides an excellent introduction to 3D modeling for beginners. This user-friendly app allows you to create, edit, and 3D print your models, making it a great tool for hobbyists and those new to the world of 3D design.
While Microsoft 3D Builder may not have the advanced features of professional CAD software, it offers enough functionality for basic design and printing. The interface is intuitive, and the basic editing tools allow you to make modifications to your models easily.
However, if you’re looking for more advanced features and capabilities, there are alternative 3D modeling software options available, such as Rhino and Autodesk Fusion 360. These tools are commonly used in industries that require complex 3D modeling and design.
Overall, Microsoft 3D Builder is a valuable tool for beginners looking to explore the world of 3D design. With its accessibility and user-friendly interface, it offers a solid foundation for learning and creating 3D models.
FAQ
Is 3D Builder suitable for beginners?
Yes, 3D Builder is beginner-friendly and easy to use, making it a great tool for those new to 3D modeling.
Can I create my own models in 3D Builder?
Absolutely! You can start from scratch by combining simple shapes or import existing 3D files to customize and personalize your models.
What file formats does 3D Builder support?
3D Builder supports important 3D printing file formats like STL, OBJ, and 3MF files.
How do I navigate and edit my 3D models in 3D Builder?
You can navigate through your 3D model by rotating, zooming, and panning the view. The app provides basic editing tools like moving, rotating, and scaling objects.
Can I import images and create 3D models from them?
Yes, 3D Builder allows you to import images and convert them into 3D models. It works best with black and white silhouette images.
Can I 3D print my models using 3D Builder?
Yes, 3D Builder provides an easy way to prepare your models for 3D printing. You can choose to use your own 3D printer or an online 3D printing service.
Are there more advanced alternatives to 3D Builder?
Yes, CAD software like Rhino and Autodesk Fusion 360 offer more advanced features and capabilities for professional 3D modeling.
Is 3D Builder suitable for professional 3D modeling?
While 3D Builder is beginner-friendly and great for basic design and printing, professionals often use more advanced software for complex 3D modeling and design.