Sublimation Onto Wood: Transforming Your Creations with Stunning Prints
Originally posted on August 18, 2023 @ 2:11 am
Have you ever considered creating vibrant designs using colorful wood?
Well, let’s jump into the exciting world of sublimation onto wood! It’s a cool way to use heat and special ink to make your designs pop. laminating sheet
Whether you want cool signs, special frames for photos, or amazing gifts, sublimating on wood lets you be creative and make things that last a long time.
So, come along, and let’s explore how to turn plain wood into something awesome with sublimation!
What is Sublimation on Wood?
Sublimation on wood is like giving wood a colorful makeover using heat and ink. It’s a simple process where your designs go from ink to gas and then cozy up to wood fibers, creating lasting and vibrant art.
This creative technique has been around for a while, adding a touch of magic to everything from signs to photo frames.
So, imagine turning plain wood into a canvas for your imagination – that’s sublimation on wood!
Can You Sublimate on Wood?
Yes! Sublimation on wood is a process where heat and pressure turn special ink into a gas, which gets trapped in the wood, creating colorful and durable designs. It’s like printing images onto wood with a heat press machine. Keep reading to find out more!
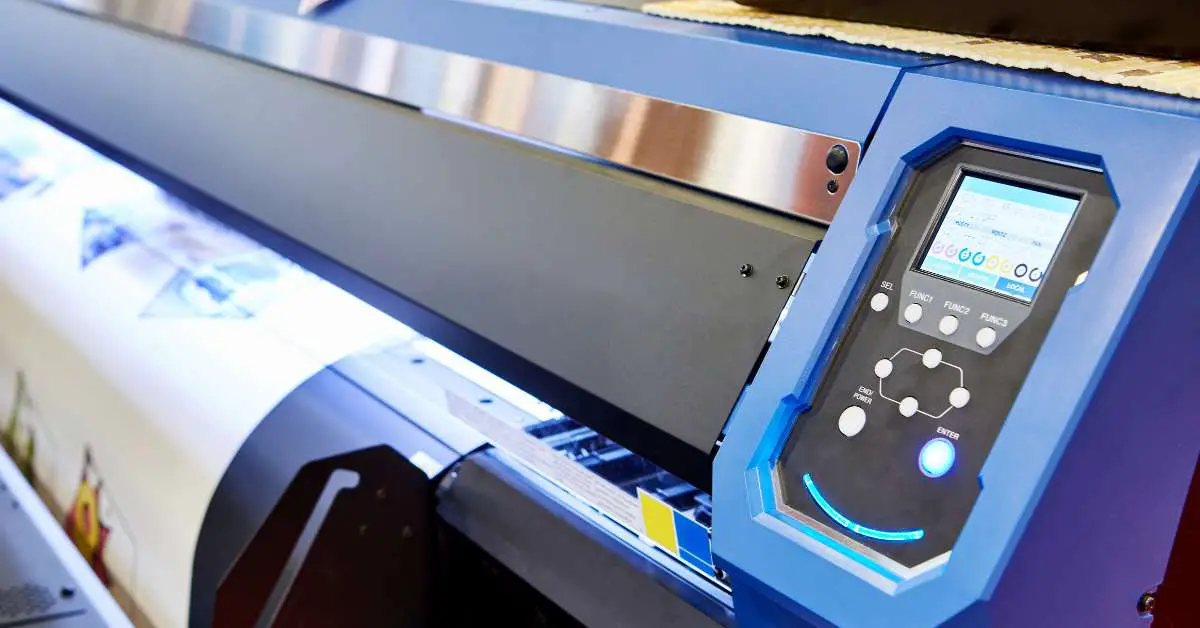
What Do You Need to Sublimate on Wood?
This wood project requires the following things:
- Dye, Sublimation Paper, Design, and Sublimation Printer: Use special, vibrant colors and sublimation paper that turns into gas when heated. Make or pick a picture and print it on special paper using a special printer.
- Wood Blanks or Wood Slices: Get a clean, smooth piece of wood where you want the picture.
- Hot Press Machine: Use a hot press machine to press the picture onto the wood with heat and squishing.
- Heat-Resistant Tape: This tape can help you secure your prints, so make sure you buy a good heat-resistant tape.
- Clear Protector (Optional): After you’re done, add a clear coat to protect the picture and make it last longer.
- Safe Clothes: Wear special gloves and clothes to stay safe when using the hot press.
How to Sublimation on Wood?
Alright, let’s get crafty and put some awesome sublimation prints on wood! Here’s how you do it step by step:
Step 1: Gather Your Gear
First things first, make sure you have everything you need. Get your hands on:
- Special Ink and Sublimation Paper: This ink is like magic – it turns into gas when it gets hot. The paper is specially made to work with this ink.
- Design and Sublimation Printer: Find a cool picture or create your masterpiece. Print it onto the sublimation transfer paper using a sublimation printer that’s buddies with the special ink.
- Wooden Canvas: Get a wooden surface ready. It could be a plank, a sign, or whatever wooden thing you want to jazz up.
- Heat Press Machine: This is the superhero of the operation. It heats the transfer paper and puts some pressure, like a big cozy hug for your wood and design.
- Optional Shield: If you want to be extra protective, grab heat-resistant tape to secure your prints and a clear shield that you can put on top later to keep your creation safe.
- Safety Gear: We’re talking gloves and safe clothes. Remember, hot things need careful handling!
Step 2: Print the Magic
Place your design face-down on the wooden canvas.
Step 3: Feel the Heat
Time to put things in motion! Here’s what you do:
- Fire up your machine. Get it nice and toasty, just like warming up on a chilly day.
- Carefully place the wooden canvas with the design-paper sandwich inside the warmed-up heat press. Close it up gently.
- Your warmed-up heat press applies heat and pressure. The ink on the paper becomes a gas and gets cozy with the wood, making the sublimation design stick.
Step 4: Cool Down and Reveal
The action’s done, but we’re not quite finished:
- After a little while, the machine is done working its magic. Open it up, but be careful – it might be hot!
- Let everything cool down, and make sure your project is completely dry. The ink gas becomes solid again, and your sublimation design is now a part of the wood.
Step 5: Shield Up (Optional)
If you want your sublimation design to stay fresh, add that optional clear shield we discussed earlier. It’s like giving your sublimation print a little armor to keep it safe from scratches and fading.
And there you have it, a wood masterpiece with your sublimation-style design! It’s like making a picture puzzle that becomes one with wood.
Enjoy your cool new sublimation print!
Do You Need Laminating Sheet for Sublimation on Wood?
Using a laminating sheet (which is not parchment paper) isn’t a strict requirement, but it can be beneficial in certain cases. Laminating sheets, also known as thermal laminating pouches, can help protect sublimation designs during the heat press process.
So, consider buying good thermal laminating pouches or laminate sheets.
The laminating sheet is a barrier between the sublimation paper and the wood, preventing unwanted sublimation ink or residue from sticking to the heat press platen.
Using a laminating sheet can also help distribute heat more evenly across the surface of the paper, which can contribute to a more successful design transfer onto the wood.
However, if don’t use a thermal laminating sheet (protective paper or a lamination pouch), you can still achieve sublimation on wood. Ensure your paper is securely taped on the wood to prevent any shifting during the heat press process.
Additionally, using butcher paper or parchment paper as a protective layer between the sublimation paper and the heat press platen is recommended to avoid any potential ink transfer. So, if you don’t have a laminate pouch, use parchment paper.
In summary, while using a thermal laminating sheet can provide added protection and even heat distribution, you can achieve successful sublimation on wood without one.
The choice of whether or not to use laminating sheets depends on your preferences and the materials you have available.
Related Questions
Can You Sublimate Directly on Wood?
Yes, you can sublimate directly on wood. The wood needs to be smooth and clean for the best results. The heat and pressure from the sublimation process help the special ink transfer onto the wood fibers, creating vibrant and lasting designs.
How Do You Sublimate on Wood?
Sublimating on wood involves printing your design on special paper with sublimation ink. Place the sublimation design face-down on the wood and use a machine to apply heat and pressure. The ink turns into gas and fuses with the wood fibers, creating a colorful, durable design.
Can you Sublimate on Finished Wood?
Yes, you can sublimate on finished wood, but it’s trickier. The finish might not absorb the ink well, affecting the quality. Test a small area first to see how it works before doing a larger project.
Can You Sublimate on Unfinished Wood?
Sublimating on unfinished wood is usually better because the ink can penetrate the wood fibers more easily. This can result in clearer and more vibrant designs compared to finished wood.
Can I Sublimate on Painted Wood?
Sublimating on painted wood might not work well. The ink might not bond properly with the paint, leading to a less durable design. It’s best to sublimate on bare or unfinished wood for the best results.
How Long to Sublimate on Wood?
Sublimation on wood usually takes 1-3 minutes. The specific time depends on factors like the machine’s temperature and the type of wood. Follow the guidelines of your sublimation paper and ink for the best results.
Can You Sublimate on Laminate Wood?
Sublimating on laminate wood can be tricky. The heat and pressure might not work as effectively on the laminate surface, resulting in a less vibrant design. It’s better to choose natural or unfinished wood for sublimation.
Can You Sublimate on Mod Podge?
Sublimating on Mod Podge isn’t recommended. Mod Podge is a sealant, and the process might not work well on its surface. For best results, stick to sublimating on untreated wood.
Can You Sublimate On Butcher Paper?
No, you can’t sublimate directly on butcher paper. Sublimation requires a special paper that releases ink as a gas when heated. Butcher paper won’t work for this process.
How Do You Sublimate Wood With HTV?
Sublimating wood with Heat Transfer Vinyl (HTV) involves printing your design on HTV, then using heat to transfer the vinyl onto the wood. It’s different from traditional sublimation and requires a heat press machine.
What Temperature Do You Sublimate Wood?
Sublimation on wood is typically done at temperatures around 380-400°F (193-204°C). The specific temperature can vary based on factors like the type of wood and the sublimation ink being used.
How Long Does it Take to Sublimate Laminate on Wood?
Sublimating on laminate wood might take longer than on natural wood, usually around 3-5 minutes. However, remember that the results might not be as satisfactory as on unfinished or natural wood. The same goes for sublimation on laminated wood slices.
How Do You Sublimate a Wooden Cutting Board?
Sublimating a wooden cutting board involves the same process as sublimating other wooden items. Make sure the cutting board is clean and smooth, place the design face-down, and use a heat press machine to apply heat and pressure.
How Long to Press Sublimation on Wood?
Pressing sublimation on wood usually takes around 1-3 minutes. The exact time depends on the equipment, ink, and wood type. Follow the recommendations provided with your sublimation materials.
How Do You Sublimate Wood Slices?
Sublimating wood slices follows the same process as sublimating other wood items unless they’re laminated wood slices (it’s harder). Ensure the wood slice is clean and smooth, place the design face-down, and use a heat press machine to apply heat and pressure.
How Do You Sublimate Wood Ornaments?
Sublimating wood ornaments is similar to sublimating other wood items. Print your design on sublimation paper, place it face-down on the ornament, and use a heat press machine to transfer the ink onto the wood. The same goes for sublimating on any wood slices.
Can You Sublimate on Wood Earrings?
Absolutely! Sublimating on wood earrings is a stylish way to add your designs. Make sure the wood is smooth and suitable for sublimation, then use the same process with heat and ink to create your wearable art. The same goes for sublimating on any wood slices.
Can You Sublimate on Wood Clipboard?
Definitely! Sublimating on a wood clipboard is a neat idea. Prep the wood surface, apply your design using sublimation, and watch your clipboard turn into a functional piece of art. The same goes for sublimating on any wood slices.
Can I Sublimate on Bamboo Wood?
Yes, you can sublimate on Bamboo wood, including Bamboo wood slices. Bamboo’s natural grain adds a unique touch to your designs. Remember to ensure the bamboo is suitable for sublimation, and follow the same steps to work your creative magic.
Can I Sublimate on Wood Rounds?
Yes, you can sublimate on wood slices. They provide a fantastic canvas for your designs. Make sure the surface is ready, then use the process to bring your ideas to life.
How To Sublimate on Wooden Coasters?
Sublimating on wooden coasters is a breeze, like sublimating on other wood slices. Ensure they’re clean and smooth, then follow the process. Soon enough, you’ll have both functional and artistic coasters. The same goes for sublimation on any wood slices.
How To Sublimate on Wood Letters?
Sublimating on wood letters is a great way to add a personalized touch. Prepare the wood letters, apply your design with sublimation, and let the heat do its magic. Your letters will turn into eye-catching decor pieces. The same goes for sublimation on wood signs or other wood slices.
How To Sublimate on Wood Circles?
Sublimating on wood circles is a creative endeavor. Start with clean, smooth wood circles, apply your design using sublimation, and watch your circles transform into versatile pieces of art that can be used for various crafts and projects. The same goes for sublimation on wood signs or other wood slices.
How Do You Use Sublimation Spray on Wood?
Sublimation spray isn’t typically used on wood. The process relies on heat and pressure to transfer ink. Spray-on methods work better for fabrics and other porous surfaces.
How Can I Enhance the Durability of My Sublimation Design on Wood?
After placing your sublimation print, you can use a laminate sheet to protect and seal the design, ensuring it lasts for years.
What Should I Do With Excess Laminate After Sublimation?
Once the design is transferred, carefully remove any excess laminate to reveal your vibrant and perfectly preserved print.
Can I Use a Craft Knife to Add Intricate Details to My Sublimation Blanks on Wood?
Certainly, a craft knife can be used to carefully remove excess vinyl or create precise designs on blanks for a personalized touch.
Is the Sublimation Paper Size Important When Working on Wood Projects?
Using the correct size ensures your design fits perfectly on the surface without cropping.
Can I Use White Paint to Highlight My Sublimation Blank on Wood?
Adding a light coat of it can enhance the visual impact of your sublimation blank, creating a beautiful contrast.
How Can I Make Sure My Sublimated Print Turns Out With High Print Quality?
Start with an inkjet printer that delivers excellent print quality to ensure your print captures all the intricate details.
Can I Use a Self-Healing Cutting Mat to Trim Excess Laminate From My Sublimation Projects?
A self-healing cutting mat provides a smooth surface to remove any excess and achieve clean edges on your project.
What Pressure Should I Use on the Heat Press for Sublimation Wood Projects?
Applying medium pressure during the heat press process successfully transfers your print onto the wood blank.
How Do I Ensure My Sublimated Design Stays Intact on the Wood Surface?
After carefully placing your sublimation print, use a laminate sheet to protect and secure the design, creating a lasting bond.
Can I Use a Foam Roller to Apply a Coat of Paint to My Sublimation Project?
This is a fantastic tool for applying a precise and even coat of paint to enhance the visual appeal of your print.
How Should I Handle Excess Vinyl on My Sublimation Project?
Gently and meticulously remove excess vinyl using a craft knife to ensure your print remains crisp and flawless.
Is it Important to Carefully Remove Any Excess Laminate After Sublimation?
Carefully removing the excess ensures your print is fully revealed and maintains vibrancy.
Can I Apply a Coat of Sanding Sealer to My Wood Blank Before Sublimation?
Applying a coat of sanding sealer to your wood blank can help create a smooth surface for optimal sublimation results.
How Do I Handle the Sublimation Process to Achieve the Best Results on Wood Projects?
Follow the steps to create sublimation by placing a sublimation print on the wood blank and applying heat and medium pressure for a vibrant and lasting print.
Can I Use a Paint Tray to Apply a Light Coat of White Paint to My Wood Blank?
Yes, a tray and brush can help you apply an even and controlled coat of paint.
How to Place Thermal Laminating Sheet Properly?
To properly place thermal laminating sheet:
- Lay the sheet flat on a clean surface.
- Position your item within the sheet’s borders.
- Peel off the backing and align the adhesive side over your item.
- Smooth out any wrinkles or air bubbles.
- Apply heat using a laminator, following its instructions.
- Once cool, your item is laminated and protected.
Sublimation Printing: Closing Thoughts
Sublimation printing is like turning your creativity into solid art. It’s a cool process where special ink transforms into gas, making designs stick to wood like magic.
Remember, smoother and untreated wood usually gives the best results. While finished or painted wood might work, they could play hard to get.
So, stick with the natural charm of bare wood for vibrant and long-lasting designs.
Whether it’s personalized signs, photo frames, or unique gifts, sublimating on wood lets your imagination run wild while keeping your creations cozy and lasting.