Master STL Editing with Our Meshmixer Tutorial
Originally posted on February 6, 2024 @ 1:53 am
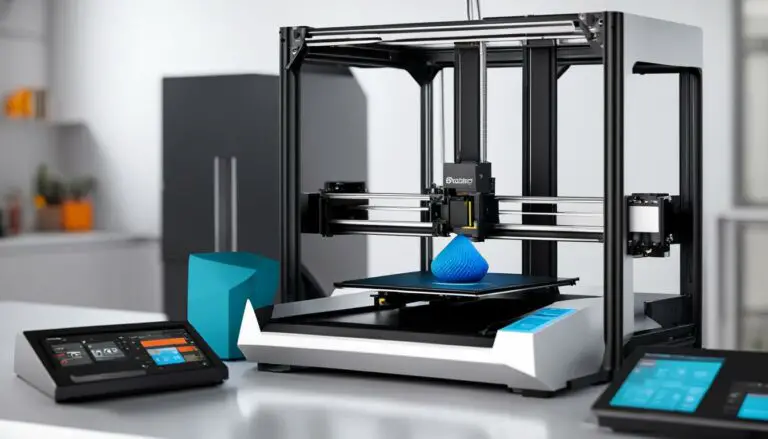
In this guide, we’ll walk you through mastering the art of STL editing with the help of Meshmixer. We’ll delve into how to blend various STL files to forge distinctive designs of your own. Utilizing Meshmixer, a complimentary and intuitive tool offered by Autodesk, you’ll be able to modify and mend STL files, enabling you to produce impressive 3D models. This tutorial is designed for all skill levels, from novices to seasoned 3D designers, and will aid in sharpening your abilities and achieving remarkable creations.
Key Takeaways:
- Meshmixer is a free software developed by Autodesk for manipulating and repairing STL files.
- With Meshmixer, you can combine, sculpt, and modify 3D models to create unique designs.
- We will guide you through the process of importing, scaling, trimming, joining, sculpting, and refining your models.
- Learn how to finalize your design and export it as an STL file ready for 3D printing.
- Mastering STL editing with Meshmixer will enhance your 3D modeling skills and inspire creativity.
Introduction to Meshmixer and STL Editing
Welcome to our comprehensive tutorial on Meshmixer, a powerful and free software developed by Autodesk that is specifically designed for manipulating and repairing STL files. With Meshmixer, you can easily combine, sculpt, and modify 3D models, unleashing your creativity and taking your designs to the next level.
Meshmixer offers a wide range of tools and features that make it a versatile mesh editing software. Whether you’re a beginner or an experienced 3D designer, Meshmixer provides an intuitive interface and robust toolset to help you achieve the desired results.
The Basics of Meshmixer and STL Editing
Getting started with Meshmixer is straightforward. To begin, you’ll need to import your STL files into the software. Meshmixer supports drag-and-drop functionality, making it easy to bring your models into the workspace.
Once your models are imported, you’ll be introduced to the various tools and features of Meshmixer’s user-friendly interface. The software offers both basic and advanced editing options, allowing you to perform tasks such as scaling, moving, and rotating your models with ease.
One of the key features of Meshmixer is its ability to repair and optimize STL files. The software includes powerful tools for fixing common issues like holes, inverted normals, and non-manifold geometry, ensuring that your models are watertight and ready for 3D printing.
In addition to the essential editing tools, Meshmixer also offers advanced features such as support generation for complex models and the ability to create custom support structures. These features make Meshmixer an ideal choice for 3D printing enthusiasts looking to optimize their designs.
“Meshmixer is a versatile and user-friendly software that allows you to unleash your creativity and bring your 3D designs to life. With its powerful editing and repair tools, you can transform STL files into stunning and printable models.”
Exploring the Toolset
Meshmixer provides a robust toolset that enables you to manipulate and refine your 3D models. Some of the essential tools you’ll find in Meshmixer include:
- Sculpting tools for shaping and refining your models
- Transform tools for scaling, rotating, and positioning your models
- Boolean tools for combining, subtracting, and intersecting models
- Selection tools for isolating and manipulating specific parts of your models
- Measurement tools for analyzing the dimensions of your models
- Auto-repair tools for fixing common issues in STL files
These tools, accompanied by Meshmixer’s intuitive interface, provide a seamless editing experience and give you full control over your designs.
| Tool | Description |
|---|---|
| Sculpting | Shape and refine your models using brushes and deformers. |
| Transform | Scale, rotate, and position your models to achieve the desired composition. |
| Boolean | Combine, subtract, and intersect models to create complex designs. |
| Selection | Select and manipulate specific parts of your models for targeted editing. |
| Measurement | Analyze the dimensions of your models for precise adjustments. |
| Auto-repair | Fix common issues like holes and inverted normals in your STL files. |
Now that you have an introduction to Meshmixer and the concept of STL editing, it’s time to dive deeper into the process. In the following sections of this tutorial, we will guide you through each step of the Meshmixer workflow, from finding compatible files for your mashup to finalizing and exporting your design for 3D printing.

By following these steps, you’ll be well on your way to finding the perfect files for your mashup. Now that you have a clearer understanding of how to select compatible files, let’s move on to the next section, where we’ll walk you through the process of importing and scaling your models in Meshmixer.
Importing and Scaling Your Models in Meshmixer
Once you have selected your files, it’s time to import them into Meshmixer. In this section, we will walk you through the process of importing multiple STL files and scaling them to the desired size and orientation. This step is crucial in preparing your models for the next stages of the editing process.
To import your STL files into Meshmixer, follow these steps:
- Launch Meshmixer on your computer.
- Click on the “File” menu at the top left corner of the interface.
- Select “Import” from the dropdown menu.
- Navigate to the location where your STL files are saved.
- Select the files you want to import by clicking on them while holding down the Ctrl key (or Command key for Mac users) to select multiple files.
- Click on the “Open” button to import the selected files into Meshmixer.
Once your files are imported, you can start scaling them to fit your desired dimensions. To scale your models in Meshmixer, follow these steps:
- Select the model you want to scale by clicking on it.
- Click on the “Edit” menu at the top of the interface.
- Select the “Transform” option from the dropdown menu.
- A Transform gizmo will appear around your model, with handles for scaling, rotating, and translating.
- Click and drag the scaling handles to increase or decrease the size of your model.
- You can also manually input specific dimensions in the Transform palette on the right side of the interface.
- Repeat these steps for each model you want to scale.
Scaling your models correctly is essential for ensuring that they fit together seamlessly during the editing process. Take your time to adjust the sizes and orientations of your models until you achieve the desired result.

| Advantages of Importing and Scaling Your Models | Challenges of Importing and Scaling Your Models |
|---|---|
| 1. Allows you to combine multiple STL files into a single design. | 1. Ensuring that the dimensions of each model are accurate and consistent. |
| 2. Provides the flexibility to adjust the size and orientation of each model to fit your specific requirements. | 2. Maintaining the proportional relationship between different components of your design. |
| 3. Enables you to create complex assemblies and intricate designs by scaling and arranging models in unique ways. | 3. Avoiding distortions or deformations that may occur during the scaling process. |
Trim and Join Your Models
After importing and scaling your models, it’s time to trim and join them together. This step is crucial to create a seamless and cohesive design that looks like it was designed that way from the beginning. In this section, we will show you how to accomplish this using the powerful Plane Cut tool in Meshmixer.
Trimming Away Unwanted Parts with the Plane Cut Tool
The Plane Cut tool in Meshmixer allows you to precisely trim away unwanted parts of your models. Whether you want to remove excess material, eliminate imperfections, or create precise cuts, this tool provides the flexibility and accuracy you need.
“The Plane Cut tool in Meshmixer is a game-changer when it comes to trimming and refining 3D models. It gives us the control to trim away unwanted parts with precision, resulting in clean and professional-looking designs.”
To use the Plane Cut tool, follow these steps:
- Select the Plane Cut tool from the toolbar.
- Position the cutting plane in the desired location.
- Adjust the orientation and angle of the cutting plane as needed.
- Click and drag the cutting plane through the model to trim away the unwanted parts.
By carefully selecting and adjusting the cutting plane, you can remove any unnecessary sections of your models, leaving behind only the desired elements.
Aligning and Merging Trimmed Models
Once you have trimmed your models, it’s time to align and merge them to create a coherent design. Meshmixer offers a range of alignment and merging tools to help you achieve the perfect fit.
To align and merge trimmed models, follow these steps:
- Select the Align tool from the toolbar.
- Choose the reference model to align your other models to.
- Select the models you want to align and merge.
- Adjust the alignment settings to achieve the desired positioning.
- Use the Merge tool to combine the aligned models into a single cohesive design.
With these powerful alignment and merging tools, you can ensure that your trimmed models fit together seamlessly, creating a visually appealing and professionally finished design.

| Benefits of Trim and Join Techniques | Example |
|---|---|
| Seamless and cohesive design | By trimming away unwanted parts and aligning the models, you can create a design that looks like it was intended from the start, with no visible seams or inconsistencies. |
| Improved printability | Trimming away excess material and aligning the models can enhance the printability of your design, reducing the chances of errors and ensuring a successful 3D printing process. |
| Enhanced aesthetics | By carefully joining and aligning the trimmed models, you can achieve a visually pleasing and professional-looking design with clean lines and smooth transitions. |
By following these trim and join techniques in Meshmixer, you can take your 3D designs to the next level, creating impressive and visually stunning models with ease.
Sculpting and Refining Your Design
Once your models are joined together, it’s time to sculpt and refine your design to create the desired aesthetic. In this section, we will introduce you to the sculpting tools in Meshmixer and guide you through the process of digitally pushing and pulling your models to achieve the desired shape and form. We will explain how to use the Flatten and Draw brushes to adjust and refine the details of your design.
With the sculpting tools in Meshmixer, you have the power to add intricate details and smooth out any rough edges in your 3D models. The Flatten brush allows you to flatten specific areas, making it easier to create sharp edges or smooth surfaces. Whether you want to add texture to a specific part of your design or create a realistic organic shape, the Draw brush enables you to sculpt with precision.
Here are some steps to follow for sculpting and refining your design in Meshmixer:
- Select the Flatten brush from the sculpting tools.
- Choose the area you want to flatten on your model.
- Adjust the brush size and strength to achieve the desired effect.
- Apply the Flatten brush to the selected area, smoothing or flattening it.
- Switch to the Draw brush for adding details or sculpting organic shapes.
- Use the Draw brush to push or pull the geometry of your model.
- Experiment with different brush sizes and strengths to refine your design further.
- Continue sculpting until you have achieved the desired shape and form.
Remember, sculpting is a creative process where you have the freedom to experiment and explore different possibilities. Take your time and don’t be afraid to iterate and refine your design until it matches your vision.
| Brush | Description |
|---|---|
| Flatten | Flattens specific areas of your model, creating sharp edges or smooth surfaces. |
| Draw | Allows you to add details or sculpt organic shapes by pushing or pulling the geometry of your model. |

By using the sculpting tools in Meshmixer, you can take your 3D designs to the next level. Don’t be afraid to experiment and let your creativity shine through as you refine your design to perfection. In the next section, we will guide you through the process of finalizing your design and preparing it for 3D printing.
Finalizing Your Design and Exporting the Model
Once you have put the finishing touches on your 3D design using Meshmixer, it’s time to finalize it and get it ready for 3D printing. In this section, we will guide you through the process of joining all the components of your design into a single model using the powerful Union tool in Meshmixer. We will also provide you with some helpful tips to ensure that your model is watertight and manifold, which is crucial for successful 3D printing.
Joining Components with the Union Tool
To bring all the individual components of your design together, you can utilize the Union tool in Meshmixer. This tool allows you to merge multiple parts into one cohesive model, eliminating any gaps or overlaps between them. By joining the components, you create a seamless design that will print as a single solid object.
The Union tool in Meshmixer is a powerful feature that simplifies the process of combining different parts of your design. Simply select all the components you want to merge, then click on the Union button to join them together. Meshmixer automatically analyzes the geometry and fuses the selected parts into a single object.
Ensuring Watertight and Manifold Models
Before exporting your design for 3D printing, it’s essential to ensure that the model is watertight and manifold. A watertight model has no holes or gaps, while a manifold model is solid and has consistent surface orientation. Both characteristics are vital for a successful print without any defects. Meshmixer provides tools to help you identify and fix any issues with your model.
- Use the Inspector tool in Meshmixer to check for any holes or non-manifold geometry. The tool will highlight any problem areas that need attention. To fix these issues, you can utilize Meshmixer’s robust tools such as the Make Solid function or the Fill Holes tool.
- Ensure that the surfaces of your model are oriented consistently. Meshmixer’s Align feature can help you orient and align the normals of your model’s surfaces, ensuring a uniform appearance when 3D printed.
Exporting Your Finalized Design
Once you have finalized your design and resolved any issues, it’s time to export it as an STL file, which is the standard file format for 3D printing. To export your design from Meshmixer, follow these simple steps:
- Click on the File menu in Meshmixer and select Export.
- Choose the STL file format and specify the file name and location where you want to save your design.
- Adjust any export settings if necessary, such as the polygon resolution or file size.
- Click on the Export button to generate the STL file.
Once exported, your STL file is now ready to be used with your 3D printer or shared with others for printing.
With the finalization and export of your design complete, you are one step closer to seeing your creation come to life through 3D printing. In the next section, we will conclude our tutorial and share some final thoughts and tips to further enhance your 3D design journey.
Conclusion
Now that you have mastered the art of STL editing with Meshmixer, you are equipped with the skills to create unique and stunning 3D designs. Throughout this tutorial, we have covered the essential steps and techniques for mixing and editing STL files. By using this powerful mesh editing software, you can unleash your creativity and bring your ideas to life.
We hope that this tutorial has helped you enhance your 3D modeling skills and inspired you to explore the possibilities of STL editing further. Meshmixer offers endless possibilities for creating intricate designs and pushing the boundaries of what is possible in 3D design.
With the knowledge you have gained, we encourage you to continue experimenting with Meshmixer and discover new ways to express your creativity. Whether you are a beginner or an experienced 3D designer, there are always new techniques and approaches to learn.
FAQ
What is Meshmixer?
Meshmixer is a free software developed by Autodesk specifically designed for manipulating and repairing STL files. It offers a wide range of tools and features that allow users to combine, sculpt, and modify 3D models.
What can I do with Meshmixer?
With Meshmixer, you can import multiple STL files, scale and orient them, trim away unwanted parts, join them together, sculpt and refine the design, and export the final model as an STL file ready for 3D printing.
Is Meshmixer suitable for beginners?
Yes, Meshmixer is user-friendly and suitable for beginners. This tutorial will guide you through the process step by step, helping you enhance your 3D modeling skills.
How do I find compatible files for my mashup?
We will guide you through the process of searching for compatible files in this tutorial. We will also provide tips on finding files with the appropriate licenses for remixing and sharing.
Can I import and edit multiple STL files in Meshmixer?
Yes, Meshmixer allows you to import and edit multiple STL files. We will explain how to import them and scale them to the desired size and orientation in this tutorial.
How can I join my models together in Meshmixer?
We will show you how to trim away unwanted parts using the Plane Cut tool and how to align and merge the trimmed models to create a seamless and cohesive design in Meshmixer.
Can I sculpt and refine my designs in Meshmixer?
Yes, Meshmixer provides sculpting tools that allow you to digitally push and pull your models to achieve the desired shape and form. We will explain how to use these tools in this tutorial.
How do I finalize and export my design for 3D printing?
We will explain how to join all the components of your design into a single model using the Union tool in Meshmixer. We will also guide you through the process of ensuring that your model is watertight and manifold for successful 3D printing.