Spooky Halloween Arduino RaspberryPi Projects
Originally posted on January 31, 2024 @ 7:24 pm
During Halloween, those who enjoy DIY projects can unleash their creativity by utilizing Arduino and RaspberryPi to create spooky projects. Whether you are interested in technology or simply want to enhance your Halloween decorations, these widely-used platforms offer limitless options for crafting distinctive and interactive experiences that are sure to spook everyone.
From animated pumpkins that come to life to automated haunted houses that will send chills down your spine, we’ve rounded up a variety of Halloween project ideas that utilize Arduino and RaspberryPi. So grab your soldering iron and let’s dive into the world of DIY Halloween projects!
Key Takeaways:
- Arduino and RaspberryPi allow for the creation of spooky Halloween projects that bring your decorations to life.
- DIY interactive animated pumpkins can be made using RaspberryPi, a 3D printer, a SONY speaker, and a projector.
- RaspberryPi Halloween automation can help you create an automated haunted house using store-bought decorations and a Raspberry Pi 3.
- Build a Squid Game Doll with a Raspberry Pi, a mannequin head, a motor, and a Raspberry Pi camera module to add a creepy element to your Halloween decorations.
- Create a Raspberry Pi powered jack-o-lantern that can follow trick-or-treaters and emit dragon-esque eyes and sounds.
DIY Interactive Animated Pumpkins
At DIY Machines, we’ve created an incredible Halloween pumpkin project that will bring your decorations to life. Using a Raspberry Pi, a 3D printer, a SONY speaker, and a projector, we’ve turned ordinary pumpkins into a mesmerizing choir of interactive animated pumpkins. This project is sure to wow your neighbors and add a touch of magic to your Halloween festivities.
With our DIY project, you can create your own interactive pumpkin display. Here’s how it works:
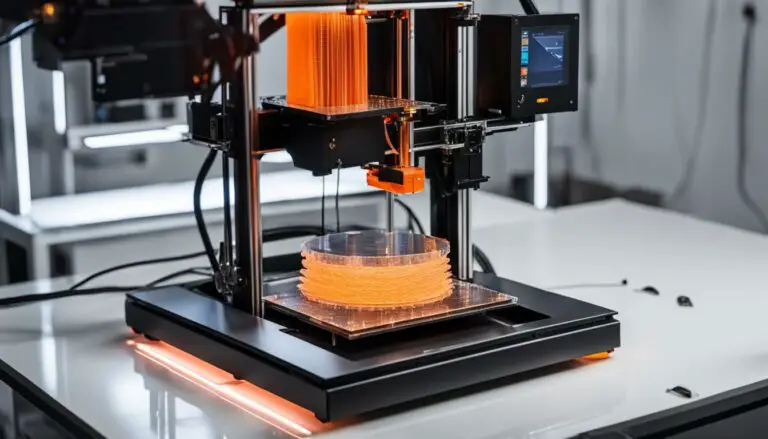
- Design and 3D print your pumpkins: Start by designing unique pumpkin shapes using our 3D templates. Once you’ve finalized your designs, simply print them using a 3D printer. This step allows you to customize the appearance of each pumpkin and gives you the freedom to express your creativity.
- Install Raspberry Pi: Next, install a Raspberry Pi inside each 3D-printed pumpkin. The Raspberry Pi will serve as the brain of the project, controlling the animations and interactions of the pumpkins.
- Set up the SONY speaker and projector: Connect a SONY speaker and projector to the Raspberry Pi. The speaker will provide high-quality sound effects, while the projector will display animated faces and visual effects onto the pumpkins.
- Create custom animations: Using programming languages such as Python, develop custom animations to bring your pumpkins to life. You can make them sing, talk, or display spooky expressions. Let your imagination run wild!
- Interact with the pumpkins: Incorporate sensors or buttons to allow visitors to interact with the animated pumpkins. This adds an extra layer of engagement and fun to your Halloween display.
With our DIY interactive animated pumpkins, you’ll create a captivating Halloween experience that will delight kids and adults alike. Whether you’re a beginner or experienced maker, this Raspberry Pi and 3D printer project is accessible and rewarding. Get ready to impress your guests and become the talk of the neighborhood with our DIY pumpkin masterpiece.

What You’ll Need:
| Materials | Tools |
|---|---|
|
|
Raspberry Pi Halloween Automation
Looking to take your Halloween decorations to the next level? NetworkChuck has the perfect solution for you – a Raspberry Pi-powered automated haunted house that will leave your guests trembling in fear. By combining the power of Raspberry Pi 3 with store-bought decorations, NetworkChuck has created a spine-chilling experience that is sure to impress.
With a step-by-step guide, this project is accessible even to those with no electronics experience. Let us guide you through the process of bringing your haunted house to life with Raspberry Pi Halloween automation.
To get started, you’ll need the following:
- Raspberry Pi 3
- Store-bought decorations
- Various sensors and actuators
By connecting the Raspberry Pi to your existing Halloween decorations, you can program it to trigger spooky sounds, eerie lights, and animatronic figures at precisely the right moment. Create an atmosphere that will send shivers down the spines of your unsuspecting visitors.
NetworkChuck’s detailed guide will walk you through each step of the process, from setting up your Raspberry Pi to programming the automation sequence. Don’t worry if you’re not familiar with coding – the guide provides clear instructions and code snippets to make it easy for beginners.

Get ready to transform your ordinary haunted house into a truly terrifying experience this Halloween with Raspberry Pi Halloween automation. With the help of NetworkChuck’s guide and the power of Raspberry Pi, you can take store-bought decorations to a whole new level of fright.
Build the Squid Game Doll with a Raspberry Pi
The Squid Game doll has become an iconic character in pop culture, and now you can bring it to life with a Raspberry Pi. This Halloween, take your decorations to the next level by building your own Squid Game doll that can follow your every move.
To create this captivating piece of Halloween decor, you will need a Raspberry Pi, a mannequin head, a motor, and a Raspberry Pi camera module. The Raspberry Pi will serve as the brain of the doll, controlling its movements and providing the creepy element that will send shivers down your spine.
By integrating the Raspberry Pi camera module, the Squid Game doll will be able to track your movements and follow you around the room. This interactive feature adds an extra level of spookiness to your Halloween setup and is sure to impress your guests.
With a bit of programming and some simple circuitry, you can create a truly unique and haunting Halloween decoration. The Squid Game doll will be the highlight of your Halloween party and is guaranteed to give everyone the chills.
Components needed:
- Raspberry Pi
- Mannequin head
- Motor
- Raspberry Pi camera module
To bring the Squid Game doll to life, you will need to follow these steps:
- Attach the motor to the mannequin head and connect it to the Raspberry Pi.
- Install the Raspberry Pi camera module and configure it to track movement.
- Program the Raspberry Pi to control the motor based on the camera’s input.
- Add any additional details or modifications to enhance the doll’s appearance.
- Show off your creation and watch as the Squid Game doll gives everyone a fright!
Get ready to impress your friends and terrify your neighbors with this Raspberry Pi Halloween project. Building the Squid Game doll is an exciting and rewarding experience that will take your Halloween decor to a whole new level. Are you ready to embrace the spooky spirit of the Squid Game?
“The Squid Game doll project is a fantastic way to incorporate technology into your Halloween decor. By combining the Raspberry Pi’s capabilities with a mannequin head and a motor, you can create a truly captivating and creepy experience. Get ready to celebrate Halloween with a touch of Squid Game-inspired horror!” – ITIGIC

| Materials | Cost |
|---|---|
| Raspberry Pi | $35 |
| Mannequin head | $15 |
| Motor | $10 |
| Raspberry Pi camera module | $30 |
Combine your passion for Squid Game with your love for Halloween by building your very own Squid Game doll. This Raspberry Pi project will take your Halloween decor to new heights, adding a unique and eerie touch that will leave a lasting impression on your guests. Get ready to bring the terror of Squid Game into your home!
Raspberry Pi Powered Jack-o-lantern
Looking to take your Halloween decorations to the next level? Meet the Raspberry Pi powered jack-o-lantern, created by the talented maker Wermy. This 3D printed Halloween decoration brings a new level of interactivity and spookiness to your doorstep.
Using a combination of Raspberry Pi programming and electronic components, this jack-o-lantern comes to life with mesmerizing eyes and bone-chilling sound effects. Its control center consists of a 7-inch screen, a speaker, and an infrared sensor, making it the ultimate trick-or-treating companion.
The Raspberry Pi powered jack-o-lantern is programmed to follow trick-or-treaters, creating an eerie illusion of eyes tracking their every move. As they approach, the jack-o-lantern’s eyes emit a dragon-esque glow, accompanied by spooky sound effects that make your Halloween decorations truly unforgettable.
Whether you’re looking to impress your neighbors or want to add an extra scare to your haunted house, the Raspberry Pi powered jack-o-lantern is a must-have addition to your Halloween setup. Its combination of 3D printed craftsmanship and cutting-edge Raspberry Pi technology guarantees a truly immersive and spine-chilling experience.
Conclusion
Halloween is a fantastic opportunity to unleash your creativity and dive into thrilling Arduino and RaspberryPi projects. These platforms open up a world of possibilities for bringing your Halloween decorations to life and creating interactive experiences that will send shivers down your visitors’ spines. Whether you decide to craft animated pumpkins, automate your spooky decorations, or construct a Squid Game doll, there is no shortage of DIY Halloween projects to explore.
By tapping into the power of Arduino and RaspberryPi, you can transform ordinary Halloween decorations into extraordinary displays of eerie brilliance. From ghostly sounds emanating from hidden speakers to lifelike movements that will give anyone a good scare, the only limit is your imagination. With accessible step-by-step guides and a wide range of resources available, even beginners can dive into this thrilling world of Halloween hacking.
So grab your Arduino board, RaspberryPi, and a dash of Halloween spirit, and get ready to create the most enchantingly terrifying decorations in the neighborhood. From haunted houses to spooky soundtracks, these DIY projects will elevate your Halloween experience and make your decorations the talk of the town. This Halloween, let your inner mad scientist shine and embark on a delightfully haunting journey with Arduino and RaspberryPi.
FAQ
What are some Halloween Arduino and RaspberryPi projects I can try?
You can try DIY interactive animated pumpkins, Raspberry Pi Halloween automation, building a Squid Game doll with a Raspberry Pi, or creating a Raspberry Pi powered jack-o-lantern.
Can you provide more details about the DIY interactive animated pumpkins project?
This project involves using a Raspberry Pi, a 3D printer, a SONY speaker, and a projector to bring pumpkins to life. It creates a choir of animated pumpkins that will amaze your neighbors.
How can I automate my Halloween decorations using RaspberryPi?
NetworkChuck has created a detailed step-by-step guide on how to create a terrifying automated haunted house using a Raspberry Pi 3 and store-bought decorations.
What is the Squid Game doll project with a Raspberry Pi?
The Squid Game doll project involves using a Raspberry Pi, a mannequin head, a motor, and a Raspberry Pi camera module to create a working Squid Game doll that follows your every move.
How can I make a Raspberry Pi powered jack-o-lantern?
You can create a Raspberry Pi powered jack-o-lantern by 3D printing a jack-o-lantern, adding a 7-inch screen, a speaker, an infrared sensor, and programming the Raspberry Pi to emit dragon-esque eyes and sounds.
What are the benefits of these Halloween Arduino and RaspberryPi projects?
These projects allow you to bring your Halloween decorations to life, create interactive experiences, and spookify your haunted house. They provide endless possibilities for DIY Halloween projects.