Announcing Raspberry Pi Python Bluetooth Entry
Originally posted on January 14, 2024 @ 12:23 pm
We are pleased to declare the arrival of Raspberry Pi Python Bluetooth, an innovative initiative that strives to establish a connection between your mobile phone and Raspberry Pi’s built-in Bluetooth. By becoming a member of our Raspberry Pi community, you can engage in this project and discover the limitless potentials of Python for Bluetooth programming.
However, we have encountered a minor setback in the form of an error message indicating a connection issue when running the script. But worry not! We are here to guide you through the necessary troubleshooting steps to fix the problem and ensure a seamless Bluetooth experience on your Raspberry Pi.
Key Takeaways:
- Join our Raspberry Pi membership to participate in the Python Bluetooth project.
- Learn how to troubleshoot and fix connection issues.
- Discover the potential of Bluetooth programming with Python on Raspberry Pi.
- Unlock a seamless Bluetooth experience on your Raspberry Pi.
- Get started on your journey of DIY tech endeavors with Raspberry Pi Python Bluetooth projects.
Understanding Raspberry Pi Bluetooth Programming
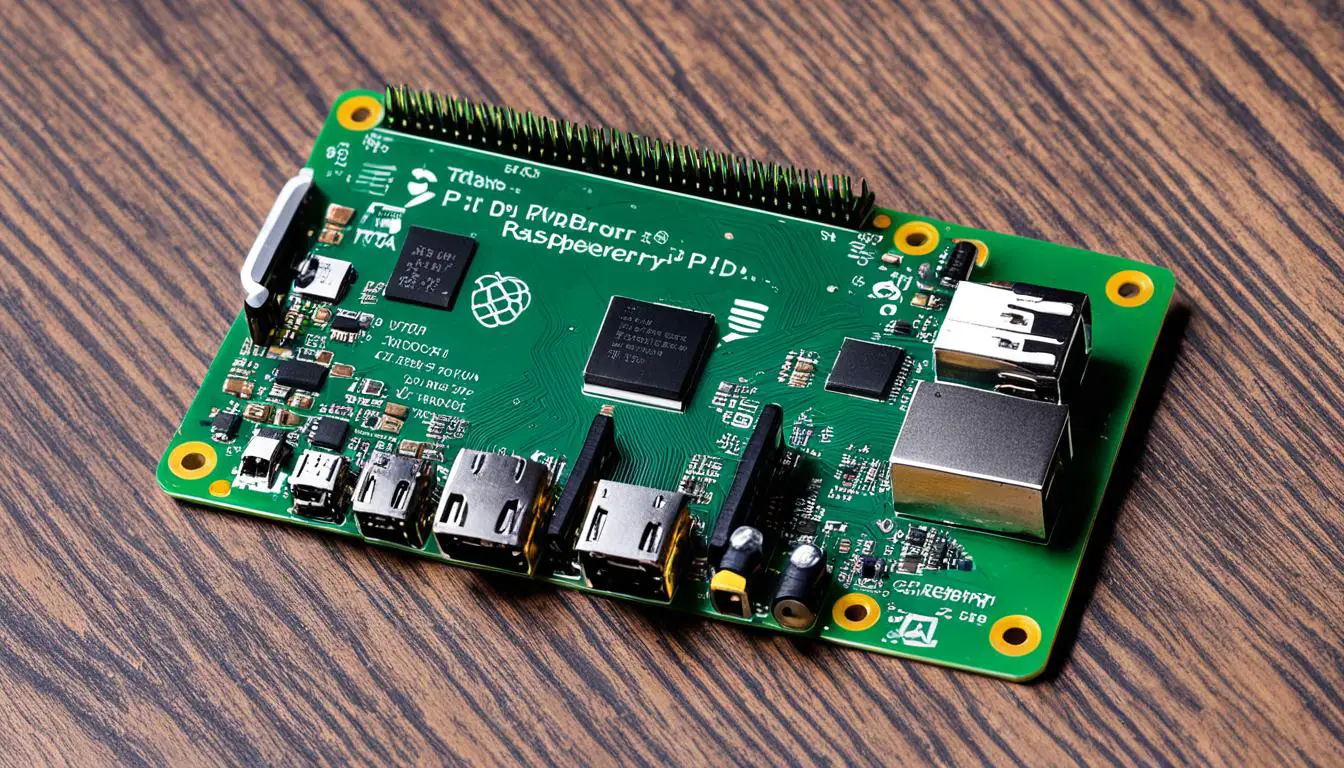
In this section, we will delve into the world of Raspberry Pi Bluetooth programming and explore the capabilities of this innovative platform. Specifically, we will focus on the Raspberry Pi 4 Model B, which offers significant enhancements in processing speed, multimedia performance, memory, and connectivity.
One prominent feature of the Raspberry Pi is its built-in Bluetooth, which enables seamless communication and data transfer. Whether you want to connect peripherals, exchange information, or control devices remotely, Bluetooth comes in handy.
Pairing a Bluetooth device with the Raspberry Pi follows a similar process to pairing on a smartphone or laptop. This user-friendly approach simplifies the setup and allows you to start working with Bluetooth quickly.
When it comes to Bluetooth programming on the Raspberry Pi, there are two main methods to consider – the Graphical User Interface (GUI) and the Command Line Interface (CLI). Both methods require the installation of specific packages to facilitate Bluetooth communication.
The GUI method provides a visual interface for managing Bluetooth services, making it easier to configure and interact with connected devices. Meanwhile, the CLI method allows for more advanced control and scripting possibilities, making it suitable for automation and customization.
Let’s take a closer look at each of these methods:
Graphical User Interface (GUI)
The GUI approach utilizes packages like Blueman, Bluetooth Manager, and other graphical tools to simplify Bluetooth setup and management. It provides a visual representation of connected devices, allowing you to pair, configure, and transfer data effortlessly. Here is an example of the package installation command in the CLI:
sudo apt-get install bluemanOnce the software is installed, you can easily pair your Raspberry Pi with a Bluetooth device by following the intuitive graphical interface.
Command Line Interface (CLI)
The CLI method involves working directly with the Raspberry Pi’s terminal and using commands to interact with Bluetooth services and devices. This method offers more flexibility and control over the Bluetooth programming process. Here is an example command to check the Bluetooth status:
hciconfigTo establish a connection and communicate with Bluetooth devices, additional commands like “rfcomm” and “sc” are utilized. These commands enable data transfer and control over connected devices.
Now that we have a brief understanding of Bluetooth programming on the Raspberry Pi, let’s explore the detailed steps and code examples in the subsequent sections to master this powerful capability.

Overview of Raspberry Pi Bluetooth Programming Methods
To summarize, Raspberry Pi offers two primary methods for Bluetooth programming – the GUI and the CLI. The GUI provides a user-friendly graphical interface for managing Bluetooth services, while the CLI offers more advanced control and automation options. Before diving into specific projects and tutorials, it’s crucial to understand these methods to choose the one that best suits your needs and expertise.
Comparison of Raspberry Pi Bluetooth Programming Methods
| Method | Description | Pros | Cons |
|---|---|---|---|
| Graphical User Interface (GUI) | Utilizes visual tools and interfaces for easy Bluetooth management |
|
|
| Command Line Interface (CLI) | Directly interacts with Bluetooth services and devices through terminal commands |
|
|
Configuring Bluetooth Communication on Raspberry Pi
To configure the Raspberry Pi’s onboard Bluetooth, we need to install several packages: Blueman, Bluez, and Bluetooth. These packages provide both a graphical user interface (GUI) and a command line interface (CLI) for accessing Bluetooth services and sending/receiving data.
Once we have installed the necessary packages, we can pair the Raspberry Pi with a Bluetooth device using the bluetoothctl software. This powerful tool allows us to interact with Bluetooth devices from the command line.
Installation Steps
- Step 1: Install Blueman: Open the terminal and run the following command to install the Blueman package:
sudo apt-get install blueman. This package provides a user-friendly GUI for managing Bluetooth connections. - Step 2: Install Bluez: Run the following command to install the Bluez package:
sudo apt-get install bluez. Bluez is the official Bluetooth protocol stack for Linux and provides essential tools and libraries for Bluetooth communication. - Step 3: Install Bluetooth: Finally, run the following command to install the Bluetooth package:
sudo apt-get install bluetooth. This package contains additional utilities for Bluetooth configuration and management.
Paired Device Setup
With the packages installed, we can now pair our Raspberry Pi with a Bluetooth device. The bluetoothctl software provides a powerful command line interface for managing Bluetooth connections.
Here are some essential commands for establishing a connection:
- power on: Turn on the Bluetooth adapter on the Raspberry Pi.
- devices: List the Bluetooth devices that are currently within range.
- pair <device address>: Pair the Raspberry Pi with a specific Bluetooth device. Replace <device address> with the address of the device you want to pair.
By following these steps, we can configure the Bluetooth communication on the Raspberry Pi and establish a connection with other Bluetooth devices.

“Bluetooth provides a versatile and convenient method for wireless communication on the Raspberry Pi. With the right packages installed, we can seamlessly connect and interact with Bluetooth devices using the Raspberry Pi’s onboard Bluetooth.”
Transferring Files via Bluetooth on Raspberry Pi
When it comes to transferring files between a Raspberry Pi and a Bluetooth-enabled device, there are two methods you can choose from: the graphical user interface (GUI) and the command line interface (CLI). Let’s explore both options and see which one suits your needs.
Using the Graphical User Interface (GUI)
The Blueman package provides a seamless GUI experience for managing Bluetooth services on your Raspberry Pi. With Blueman, you can easily send and receive files using an intuitive interface. Here’s how it works:
- Ensure that the Blueman package is installed on your Raspberry Pi.
- Launch Blueman from the start menu or by typing “blueman-manager” in the terminal.
- Pair your Raspberry Pi with the Bluetooth-enabled device you want to transfer files to.
- Once paired, you can browse the files on your Raspberry Pi using Blueman and initiate file transfers with a few clicks.
Using Blueman’s GUI offers a user-friendly experience with visual aids to help you manage your Bluetooth file transfers smoothly.
Utilizing the Command Line Interface (CLI)
If you prefer a more hands-on approach, you can transfer files via Bluetooth using the command line on your Raspberry Pi. Here’s a step-by-step guide:
- Open the terminal on your Raspberry Pi.
- Type the command “
sdptool add sp” to add a serial port service. - Create a virtual serial port by running the command “
echo 'type character/message here' >/dev/rfcomm0“. Replace “type character/message here” with the data you want to transfer. - Establish a connection between your Raspberry Pi and the Bluetooth-enabled device.
- Transfer files by sending the desired data through the virtual serial port you created.
This method provides greater flexibility and precise control over the Bluetooth file transfer process through command line commands.
Whether you prefer the convenience of a GUI or the flexibility of the CLI, Raspberry Pi Bluetooth file transfers can be accomplished with ease. Choose the method that suits your workflow and start enjoying the seamless exchange of files between your Raspberry Pi and Bluetooth devices.

Summary Comparison of GUI and CLI for Bluetooth File Transfer
| GUI | CLI |
|---|---|
| Intuitive interface | Full control through command line commands |
| Easy file browsing and selection | Precise and customizable file transfer |
| Visual aid for seamless experience | Flexibility for advanced users |
Building a Bluetooth HID Hub with Raspberry Pi
Looking for exciting Raspberry Pi Bluetooth project ideas? We’ve got you covered! In this section, we’ll explore how to build a Bluetooth HID (Human Interface Device) hub using Raspberry Pi. This project offers a fantastic opportunity to connect wired or wireless keyboards and mice to a central hub, enabling seamless input from multiple devices.
By presenting itself as a Bluetooth keyboard+mouse device to computers, the Raspberry Pi HID hub acts as a mediator, channeling input from all connected peripherals. This functionality allows for easy switching between devices and enhances the flexibility of your setup.
Modifying the Bluez Bluetooth Stack
To create this Bluetooth HID hub, you’ll need to modify the Bluez Bluetooth stack. By default, Bluez does not support simultaneous host/device mode, which is essential for this project. By implementing the necessary modifications, you can ensure the hub operates smoothly, providing a seamless keyboard and mouse experience.
Remapping Keyboard Keys and HID Events
The Raspberry Pi Bluetooth HID hub isn’t limited to acting as a mere mediator between devices. It also enables the remapping of keyboard keys and HID (Human Interface Device) events. With this advanced feature, you have the flexibility to customize key mappings to suit your preferences, enhancing productivity and personalizing your experience.
Connecting to Multiple Computers
One of the standout features of the Raspberry Pi Bluetooth HID hub is its ability to connect to multiple computers. This means you can easily switch between different devices without the hassle of re-pairing or configuring each time. Whether you’re working on a desktop, laptop, or even a Raspberry Pi, this hub allows you to effortlessly switch between connected computers with a single click.
| Advantages of Building a Bluetooth HID Hub with Raspberry Pi |
|---|
| Centralize input from multiple keyboards and mice |
| Easily switch between connected devices |
| Remap keyboard keys and HID events |
| Connect to multiple computers |
Now that you have an idea of the potential of building a Bluetooth HID hub with Raspberry Pi, it’s time to roll up our sleeves and get started!

Controlling Raspberry Pi via Bluetooth from a Smartphone
In this section, we explore the exciting capabilities of controlling Raspberry Pi-connected devices from a smartphone using the Bluetooth HID hub created with Raspberry Pi. With this setup, you can conveniently send and receive text messages, effectively controlling the connected devices from the palm of your hand.
Imagine being able to turn on your home lights or adjust the temperature while sitting on the couch or even when you’re away from home. With the Raspberry Pi Bluetooth project, this is now a reality.
The Bluetooth HID hub acts as the bridge between your smartphone and the Raspberry Pi, enabling seamless communication and control. By connecting your smartphone to the Raspberry Pi using Bluetooth, you unlock a world of possibilities, making it a versatile remote control for all your Raspberry Pi projects.
One of the most significant advantages of this setup is the ability to control the hub via a user-friendly web interface. This means that as long as your smartphone is connected to the Raspberry Pi, you can easily send commands and control the connected devices with just a few taps on your phone’s screen.
What’s more, the Bluetooth HID hub can be paired with multiple devices, allowing for flexible and convenient control from anywhere within range. This feature is particularly useful when one of the devices is a laptop that you frequently move around.
“With the Bluetooth HID hub and a smartphone, we have the power to control all our Raspberry Pi projects right in the palm of our hands.”
If you’re inquisitive about the technical details, don’t worry. The setup process is straightforward and well-documented. All you need is a Raspberry Pi, a smartphone with Bluetooth capabilities, and some basic knowledge of Python programming.
The Benefits of Controlling Raspberry Pi from a Smartphone
Controlling Raspberry Pi projects via a smartphone offers a range of benefits, including:
- Convenience: Easily control your Raspberry Pi-connected devices from anywhere within range.
- Flexibility: Pair the Bluetooth HID hub with multiple devices for seamless control.
- User-friendly Interface: Control the hub and send commands through a sleek web interface on your smartphone.
- Remote Capability: Achieve remote access and control of Raspberry Pi projects.
Getting Started
To get started with controlling Raspberry Pi via Bluetooth from a smartphone, make sure you have the necessary hardware and follow these steps:
- Set up the Bluetooth HID hub using the Raspberry Pi and a USB Bluetooth adapter if necessary.
- Pair your smartphone with the Raspberry Pi using the Bluetooth settings menu.
- Access the web interface provided by the Bluetooth HID hub using your smartphone’s browser.
- Send commands and control your Raspberry Pi-connected devices through the web interface.
With these simple steps, you’ll be able to control your Raspberry Pi projects from your smartphone in no time.
| Benefits of Raspberry Pi Bluetooth Control | Steps to Control Raspberry Pi from a Smartphone |
|---|---|
| Convenience | 1. Set up the Bluetooth HID hub 2. Pair your smartphone with the Raspberry Pi 3. Access the web interface on your smartphone |
| Flexibility | 4. Send commands and control Raspberry Pi-connected devices |
| User-friendly Interface | |
| Remote Capability |
Automating Raspberry Pi Bluetooth Setup
The Bluetooth setup process on the Raspberry Pi can be automated using an installation script. This allows users to quickly and easily activate the Bluetooth functionality on their Raspberry Pi without manually installing packages or configuring settings.
By running the provided installation script on a fresh copy of Raspbian, users can ensure that all the necessary packages are installed and the Bluetooth configuration is set up correctly.
“Automating the Raspberry Pi Bluetooth setup process simplifies the initial setup and saves users valuable time and effort.” – Raspberry Pi enthusiasts
The installation script installs packages such as Blueman, Bluez, and Bluetooth, which provide the graphical user interface (GUI) and command line interface (CLI) for Bluetooth services. These packages are essential for establishing and managing Bluetooth connections on the Raspberry Pi.
Once the installation script completes, users can immediately start using Bluetooth on their Raspberry Pi without any additional manual configuration.
Installation Script for Raspberry Pi Bluetooth Setup
Follow these steps to automate the Bluetooth setup process on your Raspberry Pi:
- Download the installation script from a trusted source.
- Open the terminal on your Raspberry Pi and navigate to the directory where the script is downloaded.
- Run the script using the following command:
sudo bash bluetooth_setup_script.sh - The script will install the required packages and configure the Bluetooth settings automatically.
- Once the script finishes executing, restart your Raspberry Pi for the changes to take effect.
After following these steps, the Bluetooth functionality on your Raspberry Pi will be ready to use. You can now connect Bluetooth devices, transfer files, and explore various Bluetooth projects using Python on your Raspberry Pi.
Benefits of Automating Raspberry Pi Bluetooth Setup
Automating the Bluetooth setup process on the Raspberry Pi offers several advantages:
- Saves time: Manual installation and configuration can be time-consuming and error-prone. Automating the setup process eliminates these issues.
- Easy for beginners: Users with limited technical knowledge can quickly set up Bluetooth on their Raspberry Pi without dealing with complex commands or configurations.
- Consistency: Automating the setup process ensures that all necessary dependencies are installed correctly, reducing the risk of compatibility issues.
Automating the Raspberry Pi Bluetooth setup process with the installation script simplifies the initial setup and enhances the user experience, allowing users to focus on creating innovative Bluetooth projects.
| Benefits | Explanation |
|---|---|
| Saves time | Manual installation is time-consuming and error-prone. Automating the setup process reduces the setup time significantly. |
| Easy for beginners | Users with limited technical knowledge can quickly set up Bluetooth on their Raspberry Pi without dealing with complex commands or configurations. |
| Consistency | Automating the setup process ensures that all necessary dependencies are installed correctly, reducing the risk of compatibility issues. |
Automating the Bluetooth setup process on the Raspberry Pi with the installation script is a convenient and efficient way to get started with Bluetooth projects using Python. With a few simple steps, users can unlock the full potential of Bluetooth connectivity on their Raspberry Pi.
Now that you’ve automated the Bluetooth setup on your Raspberry Pi, you’re ready to explore a wide range of exciting projects and unleash your creativity!
Conclusion
Are you ready to embark on an exciting DIY tech journey? With the Raspberry Pi and Python, you have the power to create amazing Bluetooth projects. Whether you want to connect devices wirelessly, transfer files seamlessly, or build a Bluetooth HID hub for ultimate control, the possibilities are limitless.
By mastering the art of Raspberry Pi Python Bluetooth projects, you can unlock new levels of creativity and innovation. With the right resources and knowledge, anyone can dive into this world and bring their ideas to life.
So why wait? Start exploring the fascinating realm of Raspberry Pi Python Bluetooth projects today. Unleash your imagination, experiment, and let your DIY skills shine. Embrace the power of technology and create something truly extraordinary.
FAQ
Can I participate in the Raspberry Pi Python Bluetooth project?
Yes, you can participate by joining the Raspberry Pi community. Click on the provided link to become a member and start contributing.
What is the project about?
The project involves successfully connecting a cell phone to the Raspberry Pi’s onboard Bluetooth. However, there is an error message when running the script, indicating a connection issue. Steps are needed to troubleshoot and fix the problem.
What Raspberry Pi model is used in this project?
The Raspberry Pi 4 Model B is the hardware used in this project. It offers significant improvements in processing speed, multimedia performance, memory, and connectivity.
How can I configure Bluetooth communication on the Raspberry Pi?
There are two methods for Bluetooth communication on the Raspberry Pi – GUI and CLI. Both methods require the installation of specific packages like Blueman, Bluez, and Bluetooth. Once installed, the Raspberry Pi can be paired with a Bluetooth device using the bluetoothctl software.
What options are available for transferring files via Bluetooth on Raspberry Pi?
Bluetooth file transfer between the Raspberry Pi and a Bluetooth-enabled device can be done using either the GUI or the CLI. The Blueman package provides a graphical user interface (GUI) for managing Bluetooth services and sending/receiving files. The CLI method involves using commands like “sdptool add sp” and “echo ‘type character/message here’ >/dev/rfcomm0” to establish a connection and transfer files.
How can a Bluetooth HID hub be built with Raspberry Pi?
A Bluetooth HID hub can be built using Raspberry Pi, allowing wired or wireless keyboards and mice to be connected to the hub. The hub presents itself as a Bluetooth keyboard+mouse device to computers, channeling input from connected devices. This project requires modifying the Bluez Bluetooth stack since it does not support simultaneous host/device mode.
How can Raspberry Pi be controlled via Bluetooth from a smartphone?
The Bluetooth HID hub created with Raspberry Pi allows control of the Raspberry Pi-connected devices from a smartphone. By connecting the smartphone to the Raspberry Pi through Bluetooth, text messages can be sent and received, effectively controlling the connected devices. The hub is controllable via a web interface and can be paired with multiple devices.
Can the Raspberry Pi Bluetooth setup process be automated?
Yes, the Raspberry Pi Bluetooth setup process can be automated using an installation script. This script ensures that the necessary packages are installed and sets up the Bluetooth configuration for immediate use. By running the script on a fresh copy of Raspbian, users can quickly and easily activate the Bluetooth functionality on their Raspberry Pi.
What can I achieve with Raspberry Pi Python Bluetooth projects?
The Raspberry Pi provides a versatile platform for creating Bluetooth projects using Python. From establishing Bluetooth connections and transferring files to building a Bluetooth HID hub and controlling devices from smartphones, the possibilities are endless. With the right resources and knowledge, anyone can dive into the world of Raspberry Pi Python Bluetooth projects and unleash their creativity in DIY tech endeavors.